9 Wheatstone

Stone patio

A paver patio under the deck — a three-colour pattern, a curved walkway, and a porch step, every brick placed in CAD before it was placed on site.


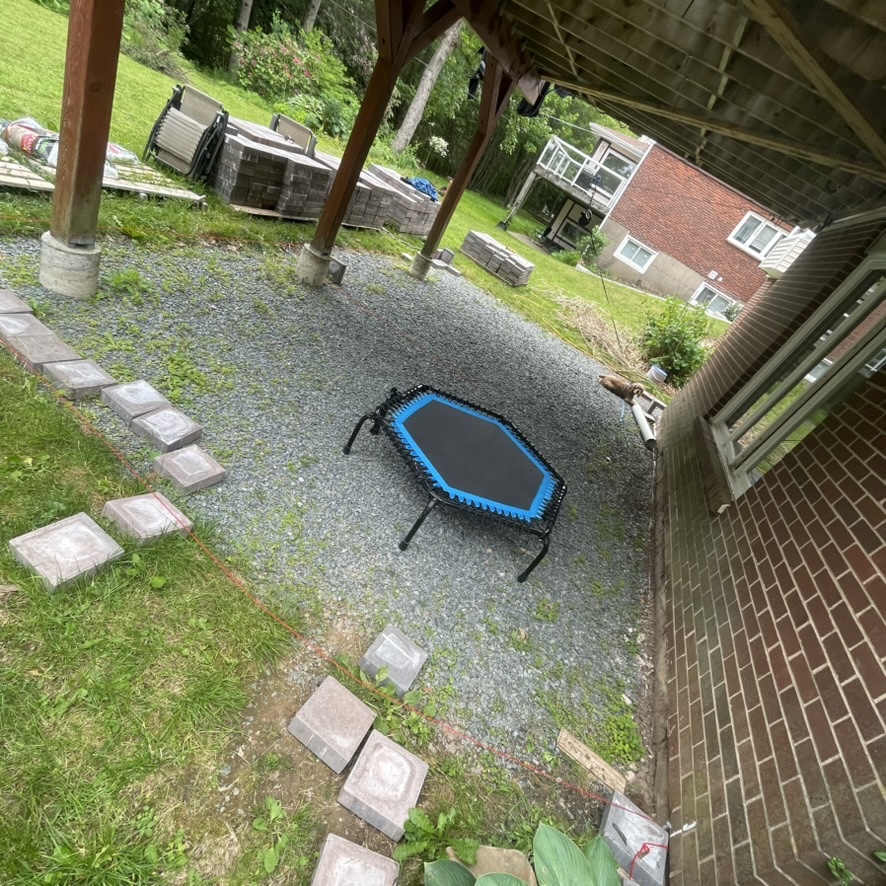
Gravel pad under the deck at 9 Wheatstone before the patio, with pavers stacked on pallets
Before

Where it started

A gravel pad under the deck, with the pavers stacked and waiting.
Finished stone patio at 9 Wheatstone
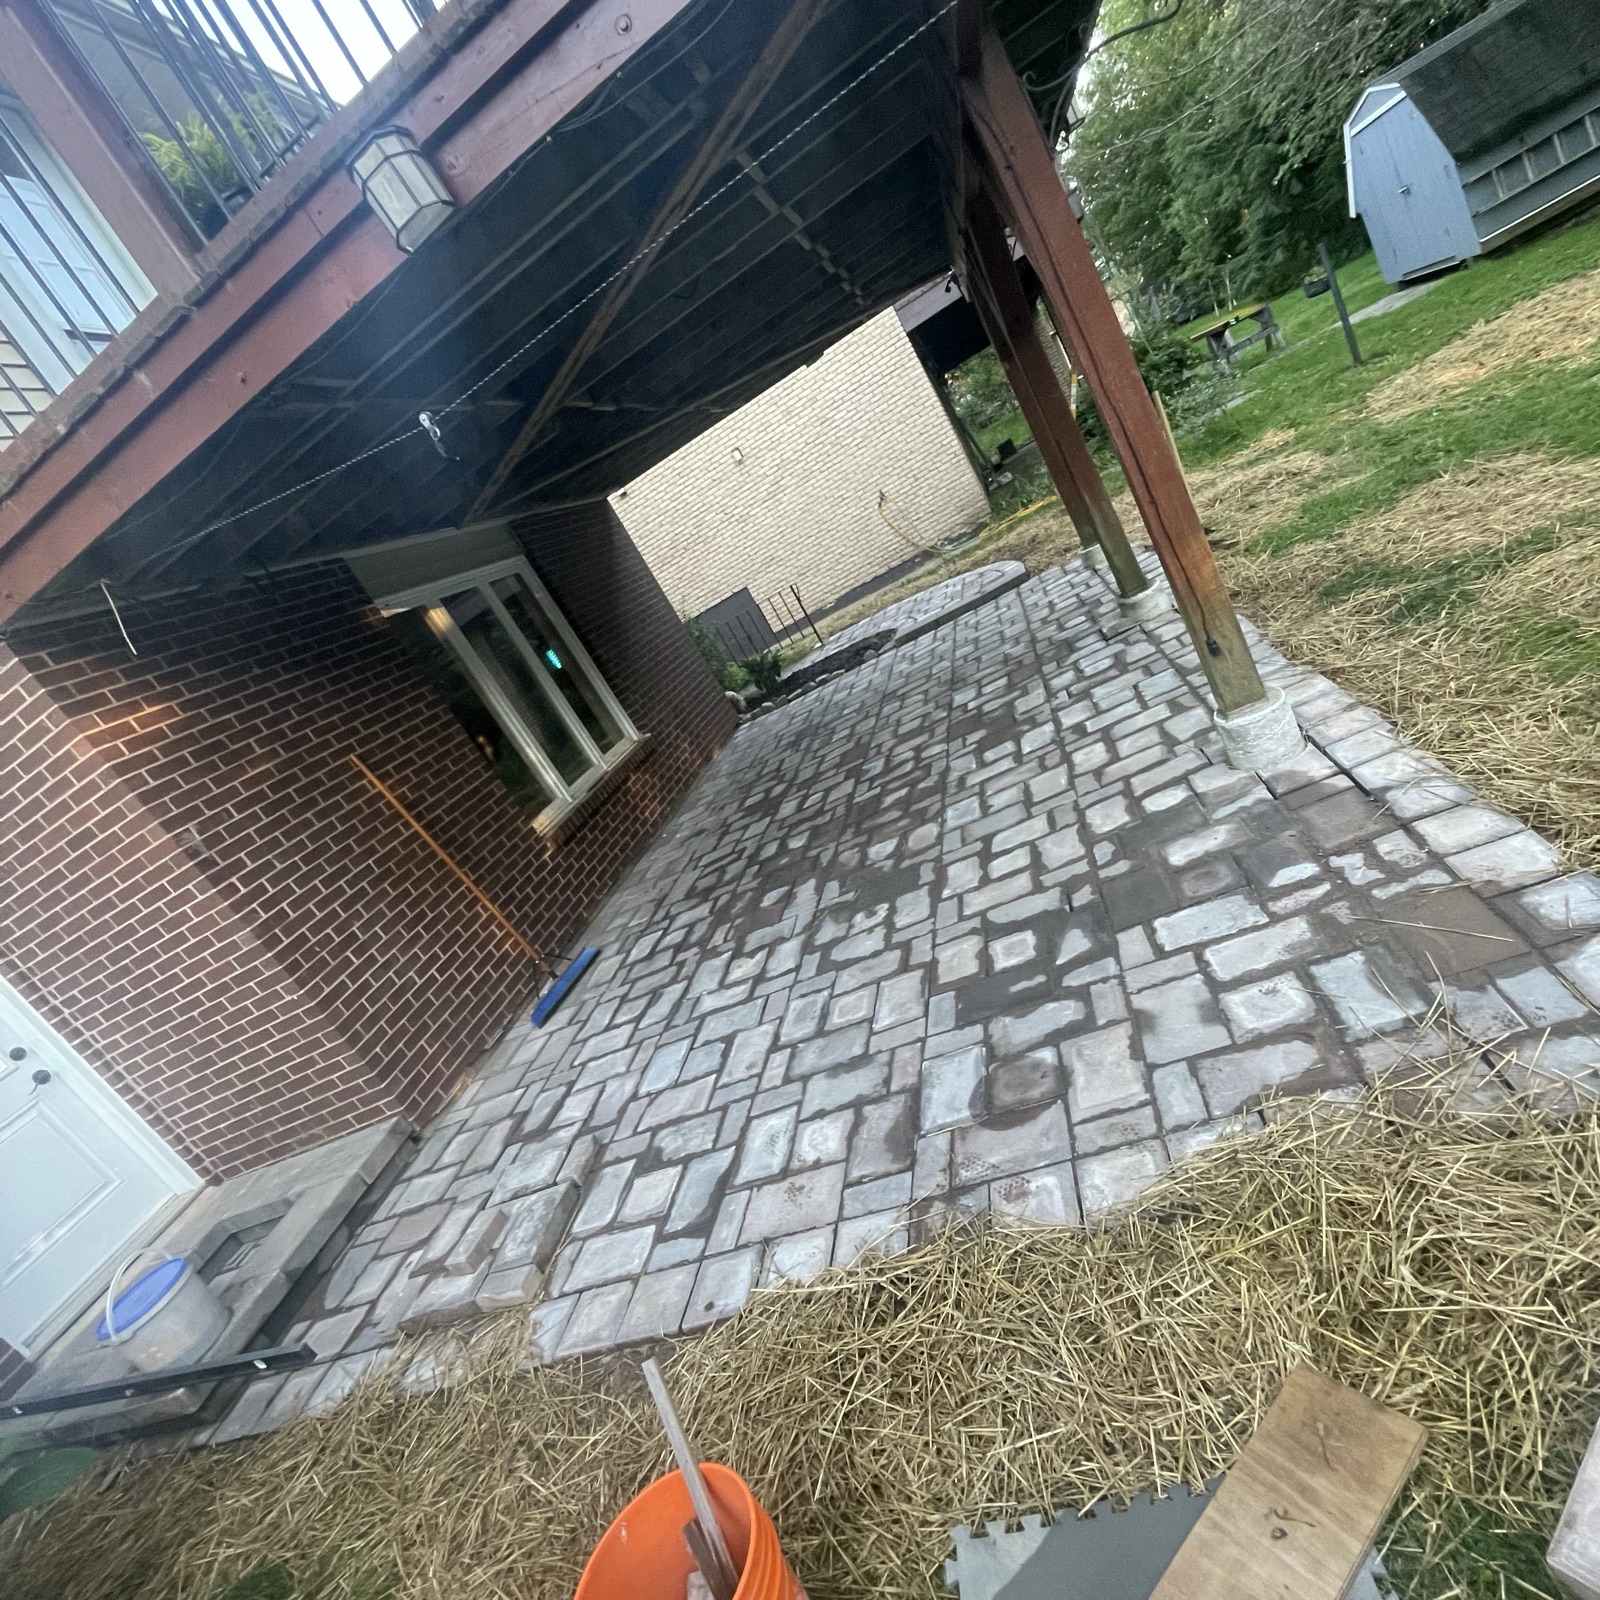
Finished

The result

Pavers laid under the deck and around the posts.
CAD model of the stone patio at 9 Wheatstone
Design

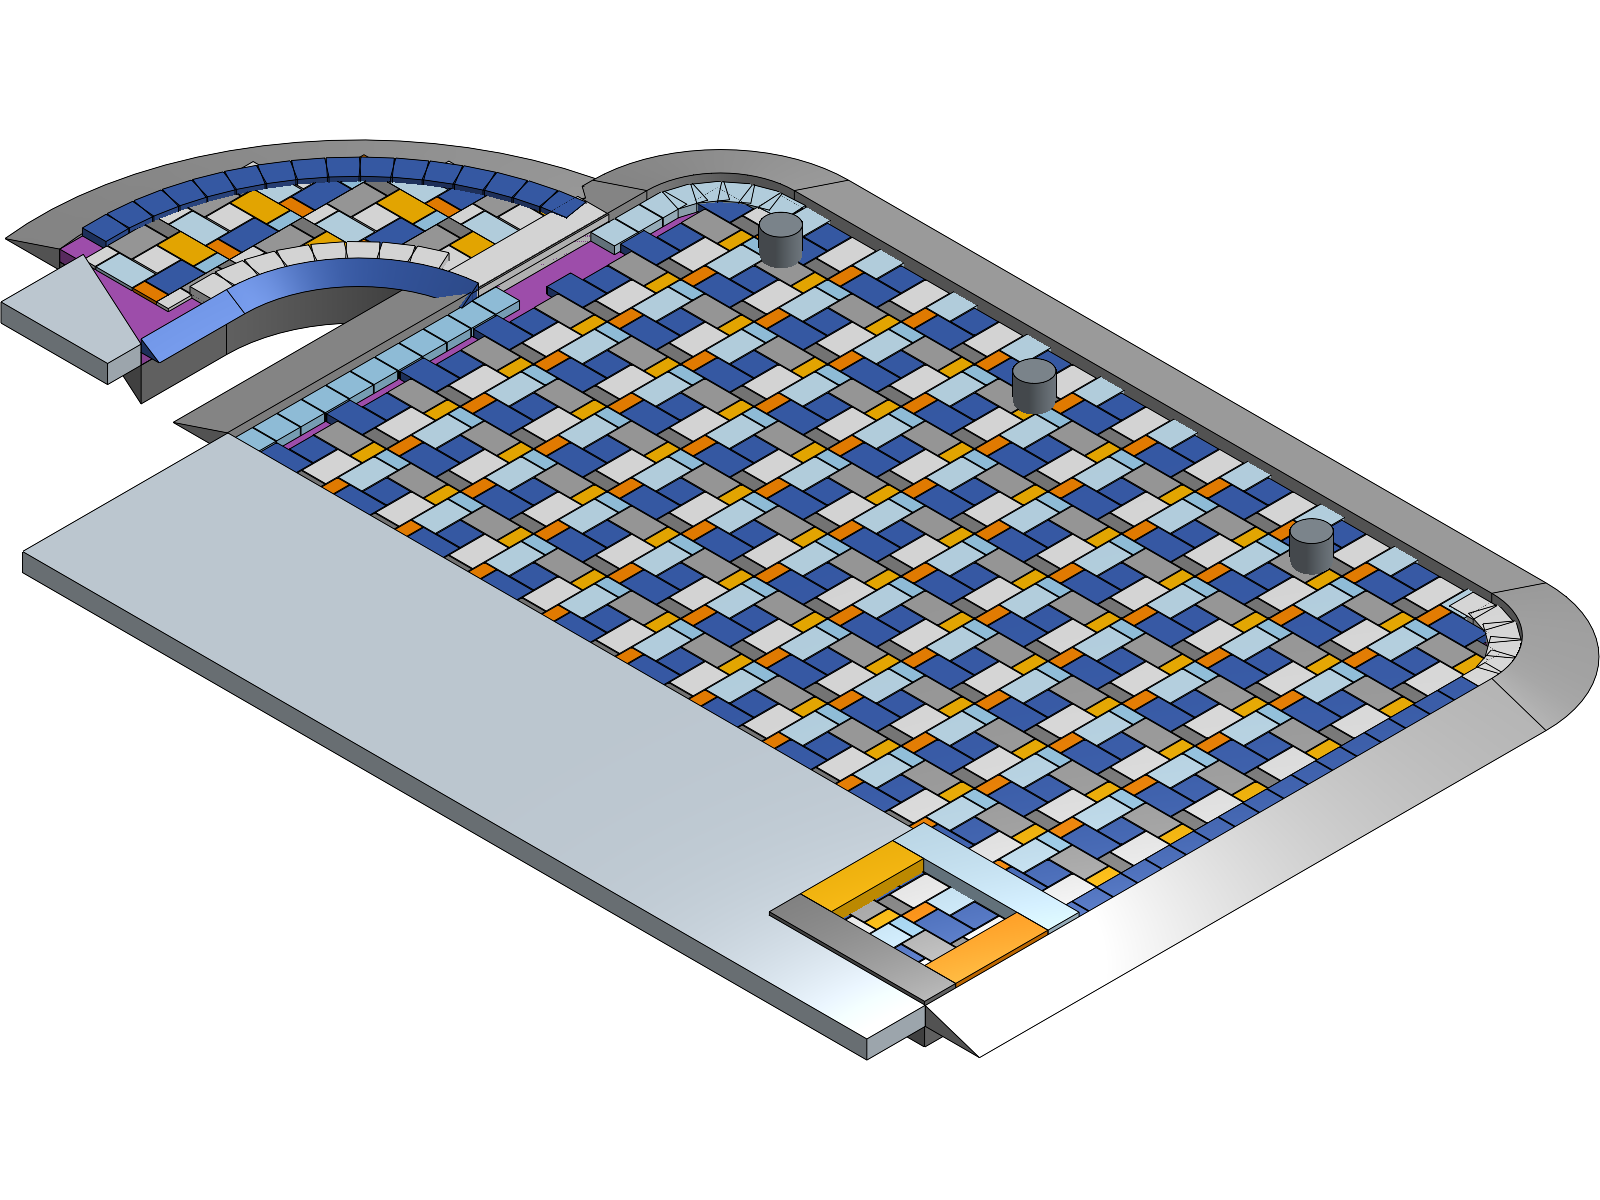
CAD model

Patio, landing, and path modeled in Onshape — with a bill of materials pulled straight from the model.

Open the 3D model

From sketch to model

Three months of design, in order — pattern, levels, steps, and every cut worked out on screen first. Tap a drawing to see it full size.
Hand-drawn sketch of a paver pattern and border
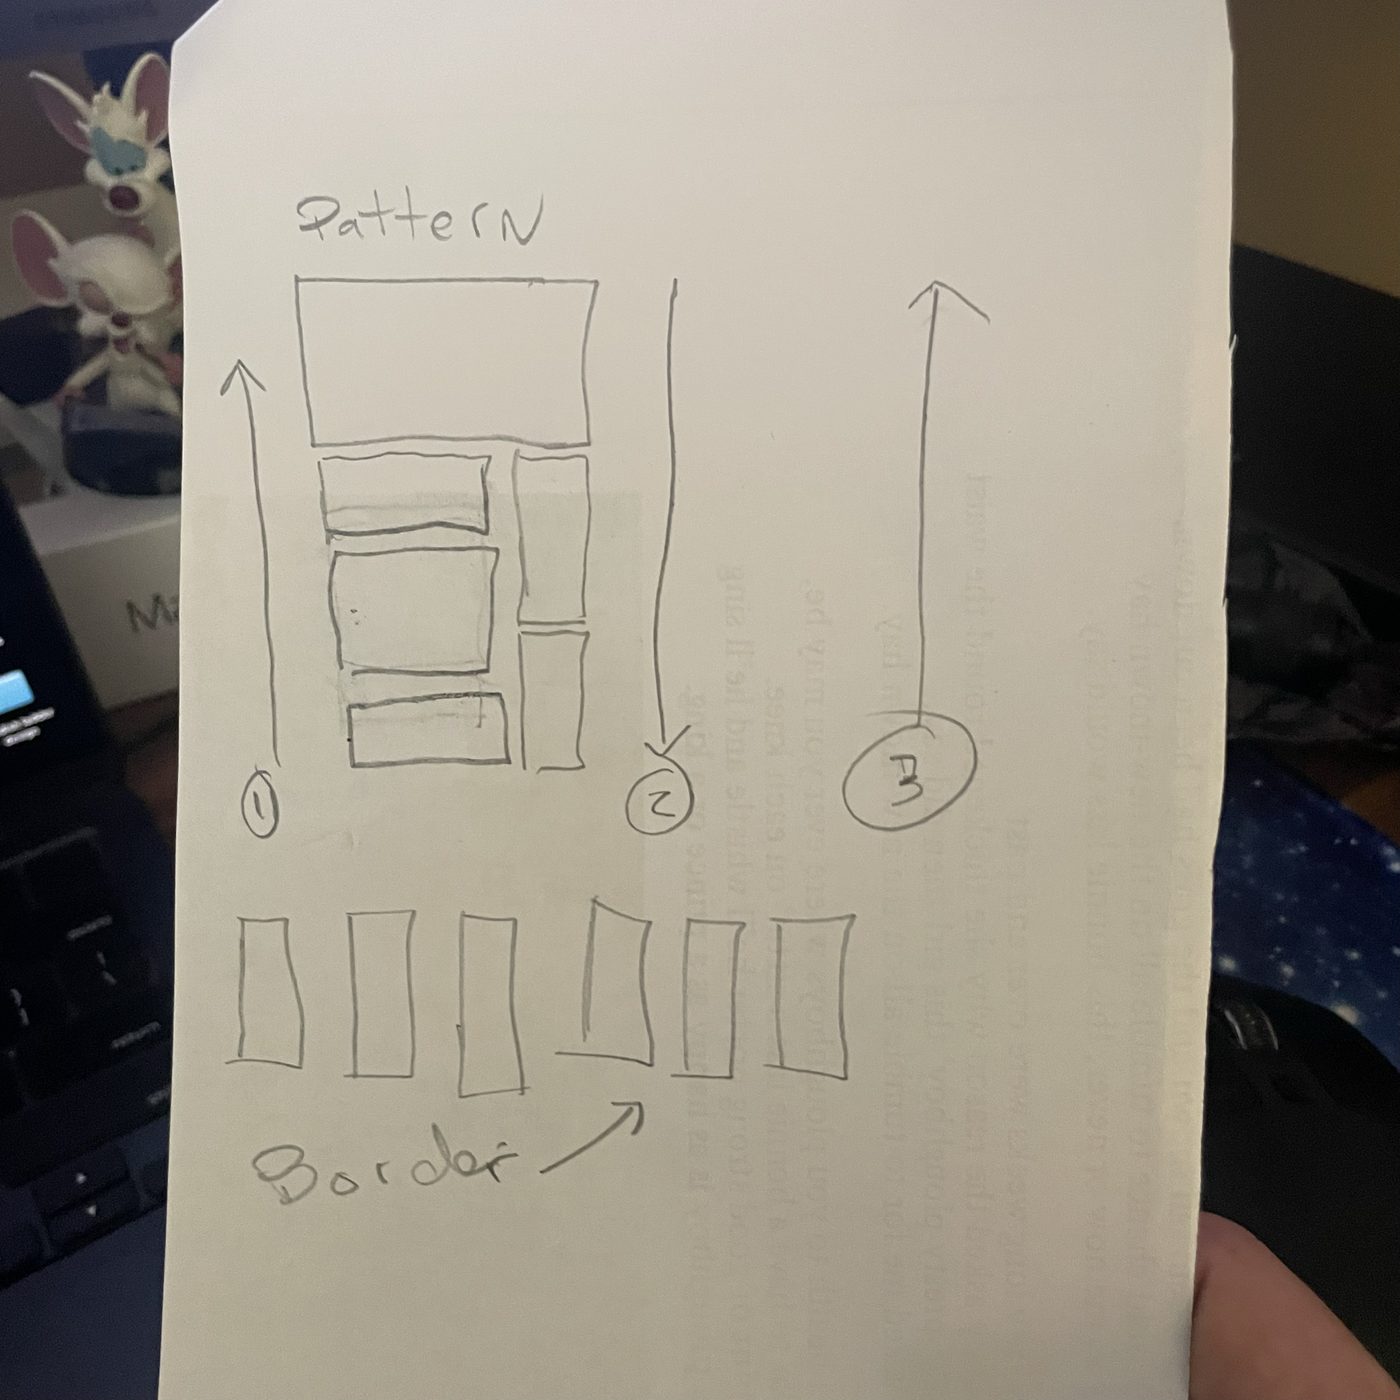
May 23 · Brief

The client's sketch

The pattern idea, drawn on paper — where the design started.
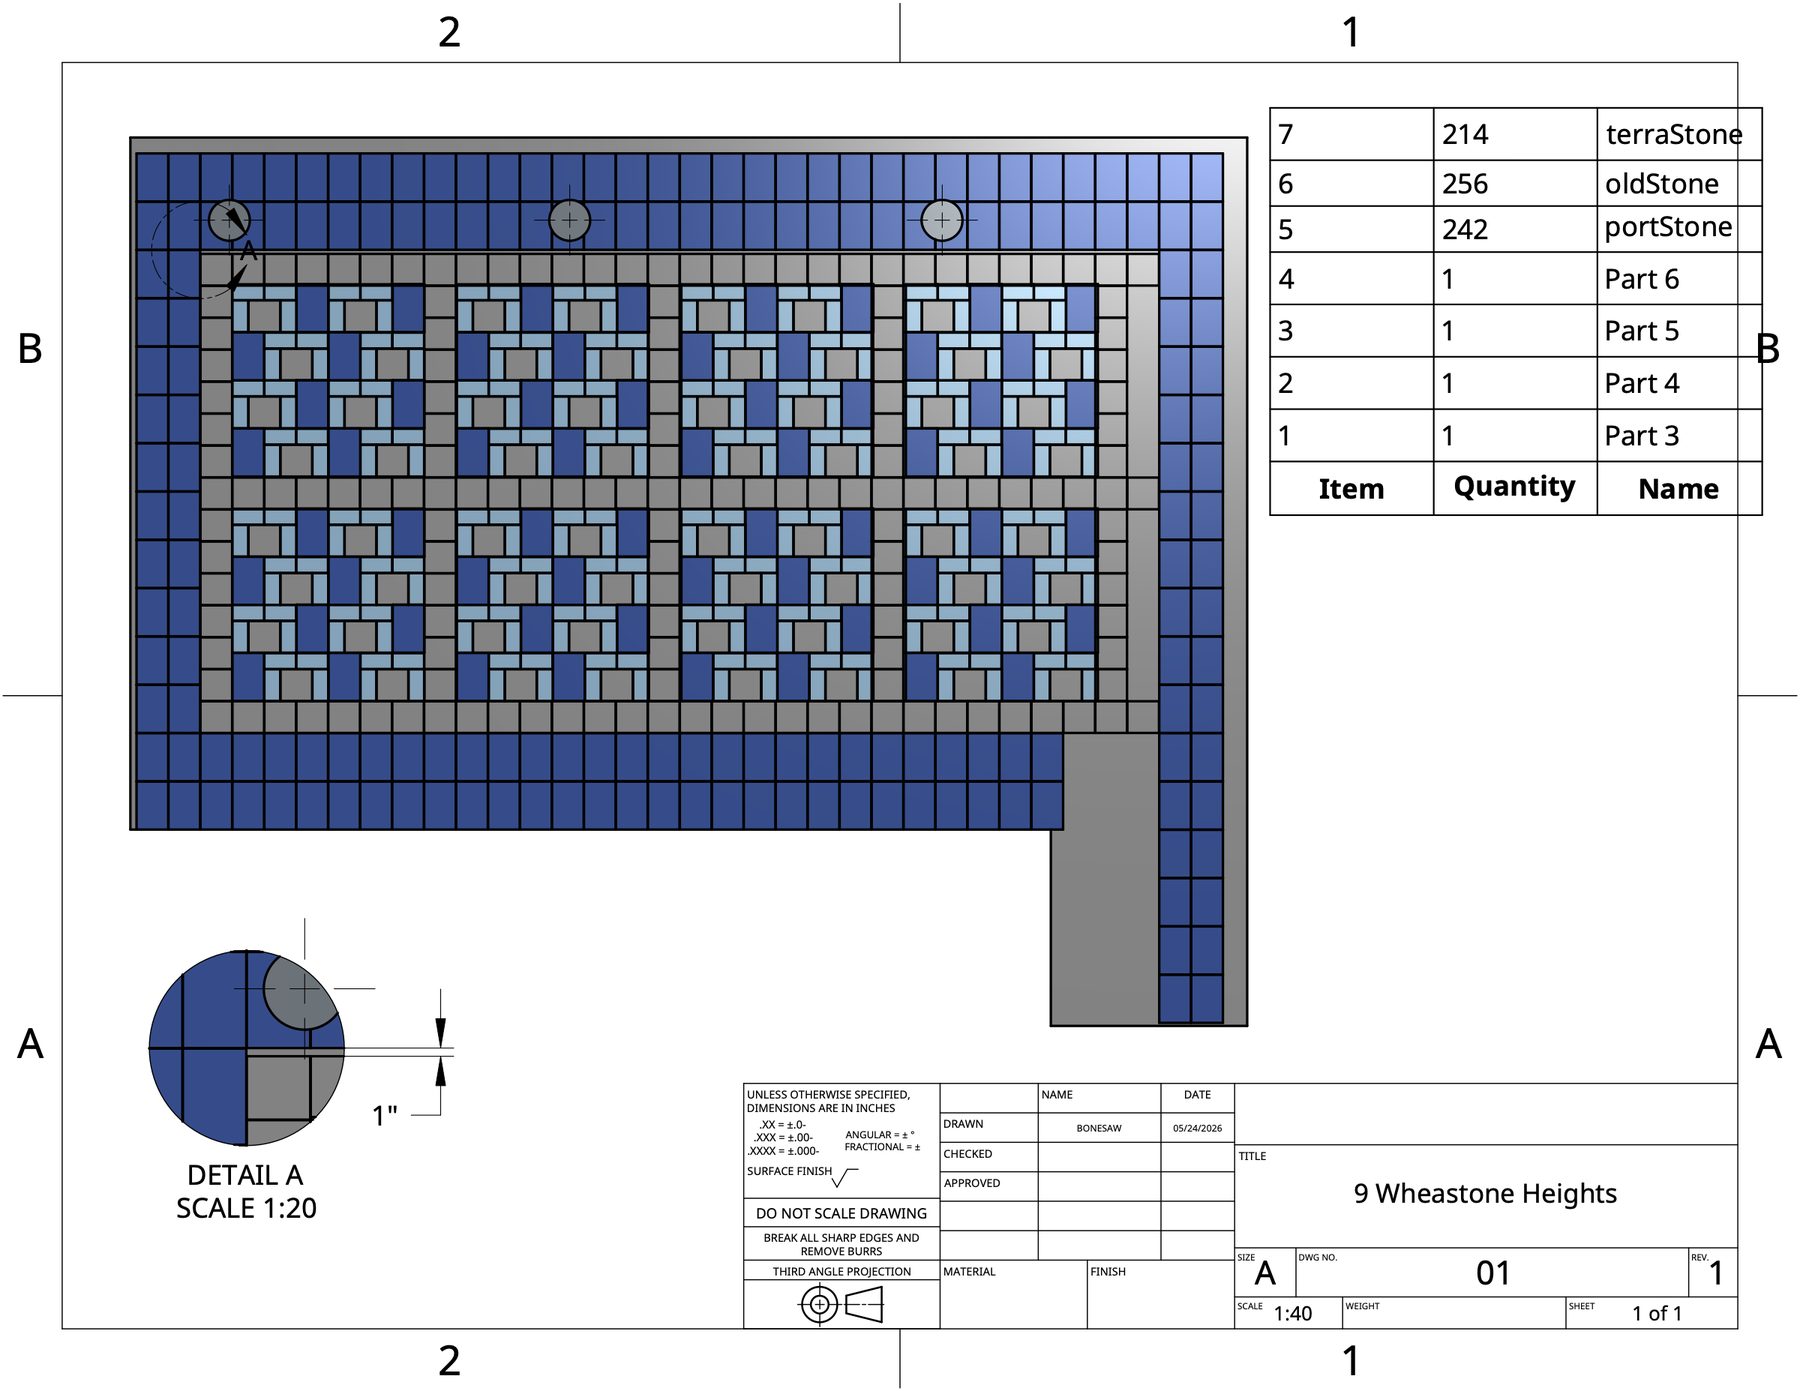
Drawing of the first patio layout with a brick count table
May 25 · Layout

First layout

The pattern laid out brick by brick, with a count of each colour pulled from the model.
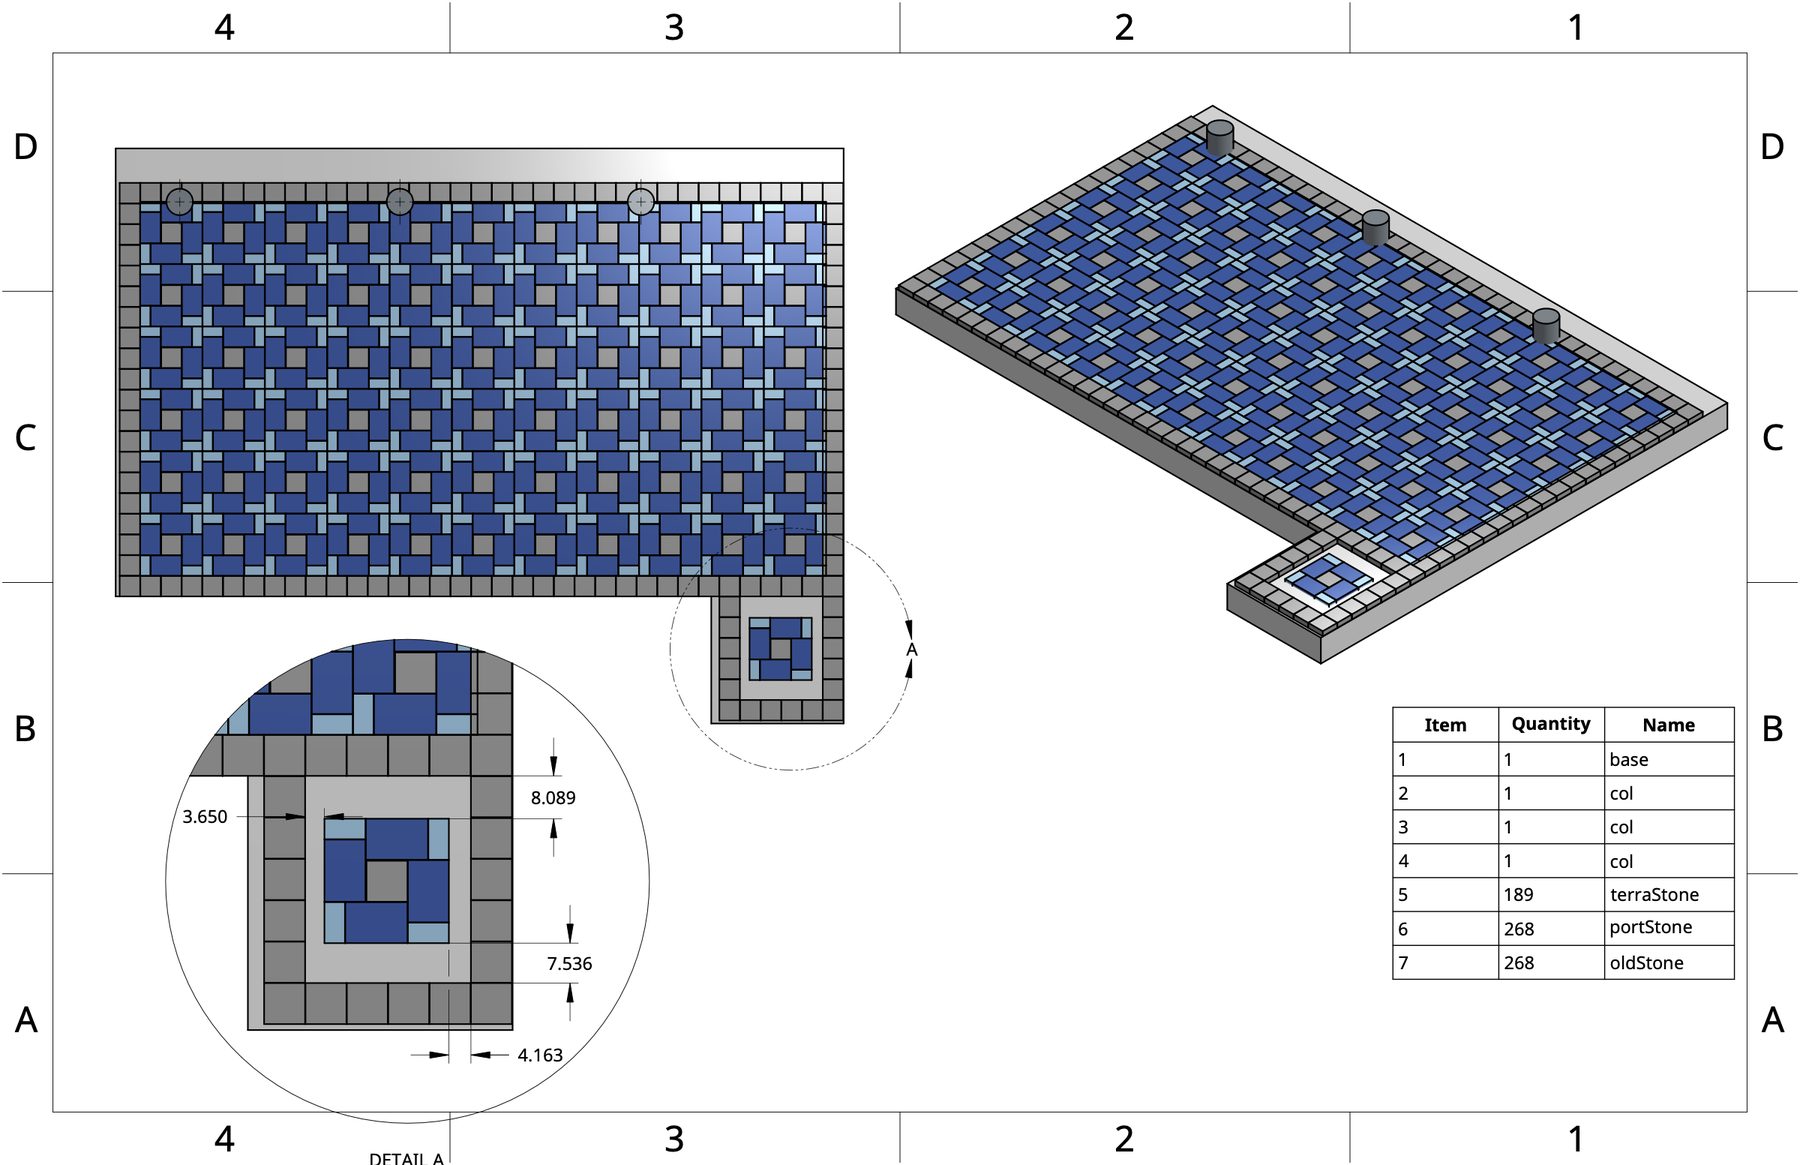
Drawing of a pinwheel paver pattern with a detail view
May 26 · Pattern

Pinwheel pattern

Trying a pinwheel pattern, with a detail of how it fits around the step.
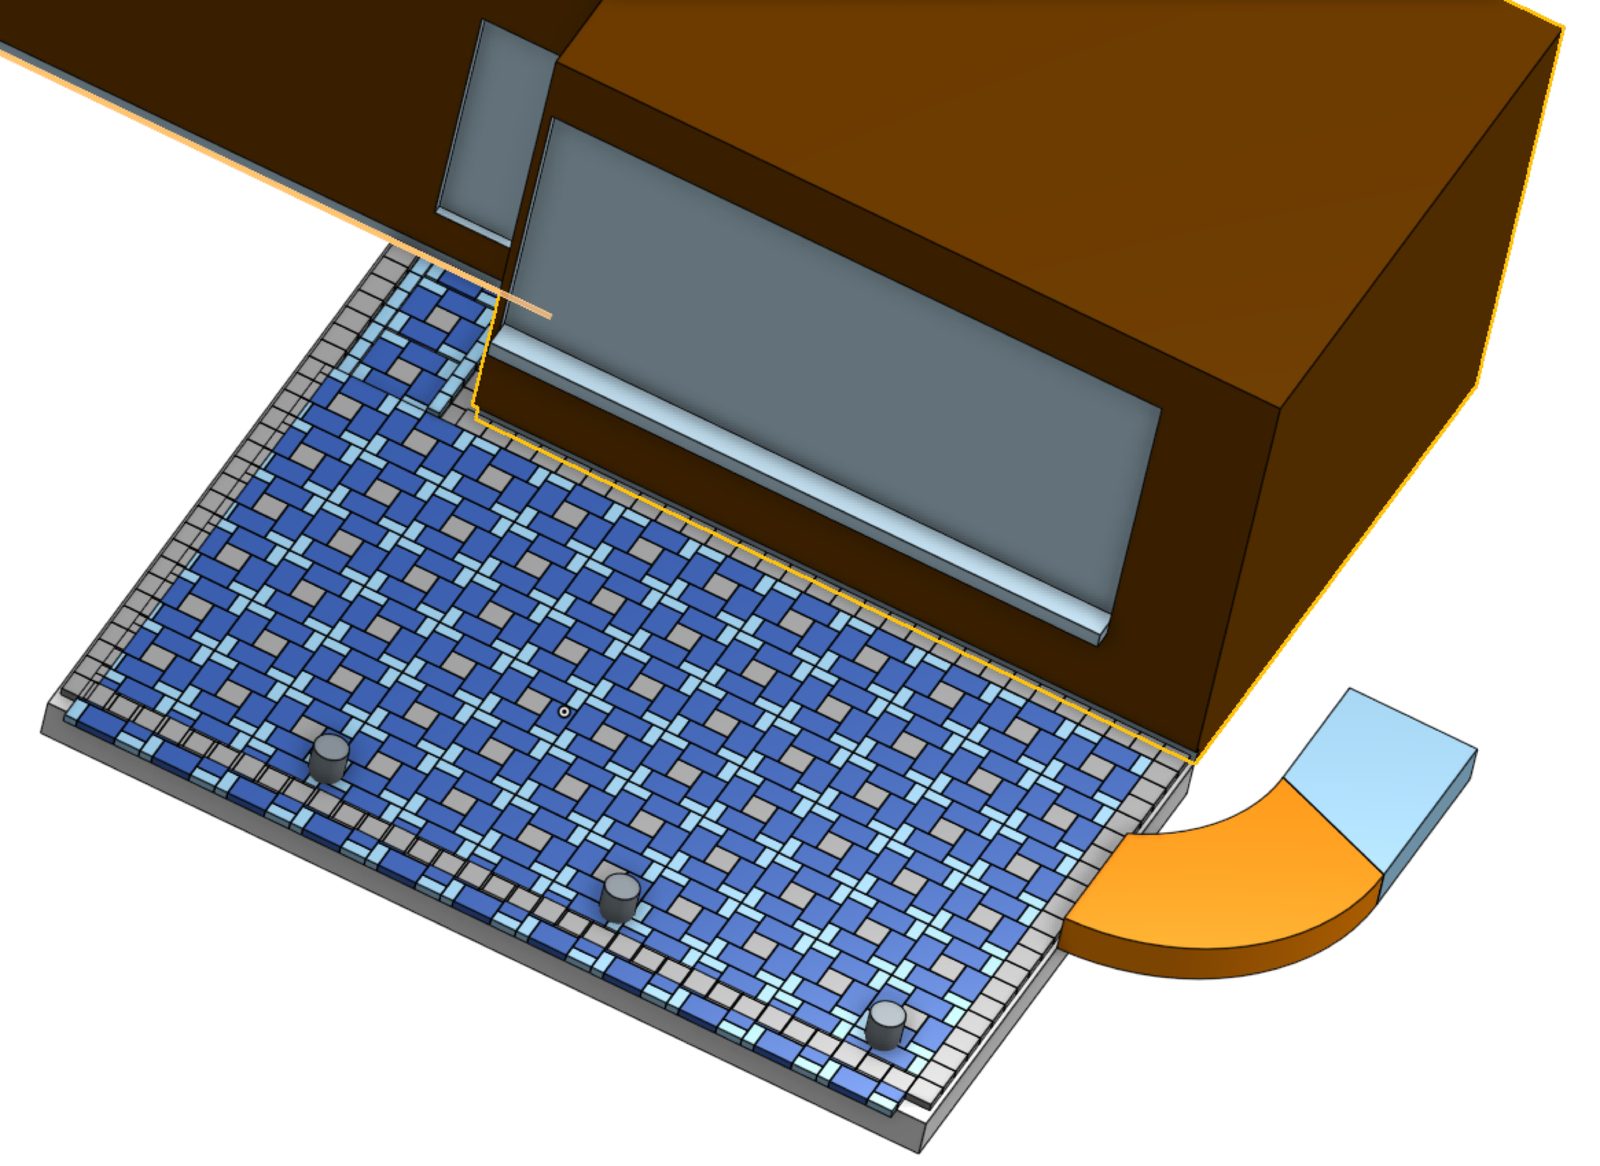
Render of the patio against the house with a landing and walkway
Jun 1 · Context

Adding the landing

The patio modeled against the house, with a landing and the start of the walkway.
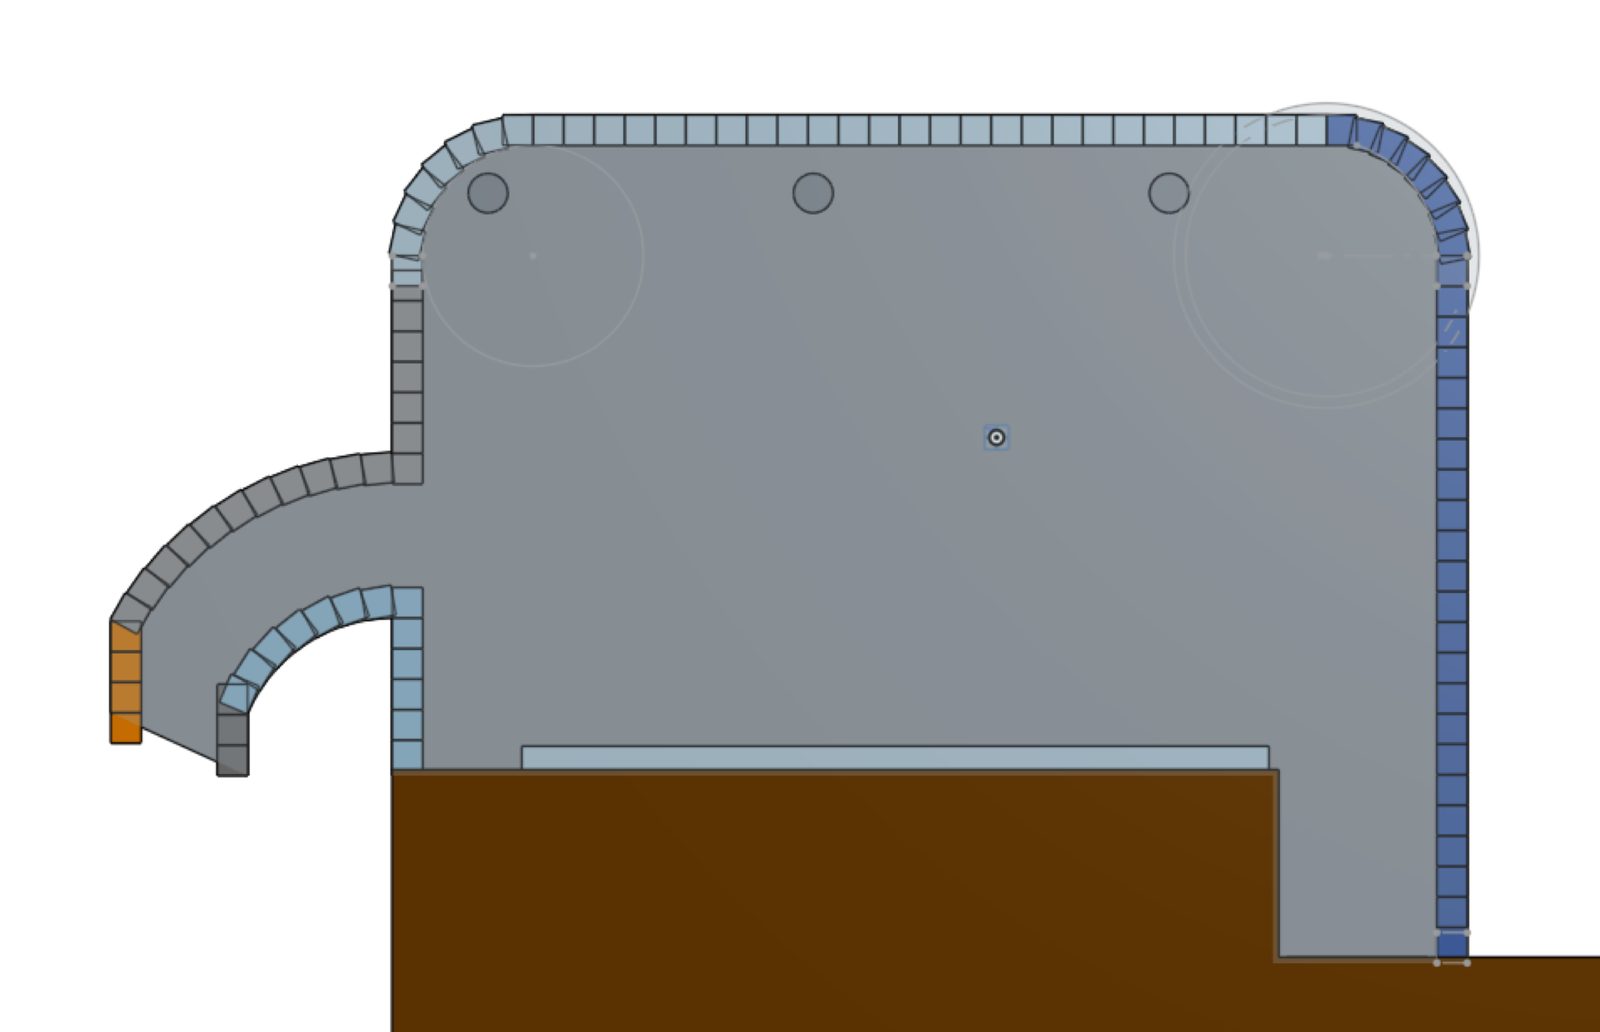
Plan view of the patio border and curved walkway
Jun 25 · Border

Border and walkway

A border course with rounded corners, and the walkway curving off to the side.
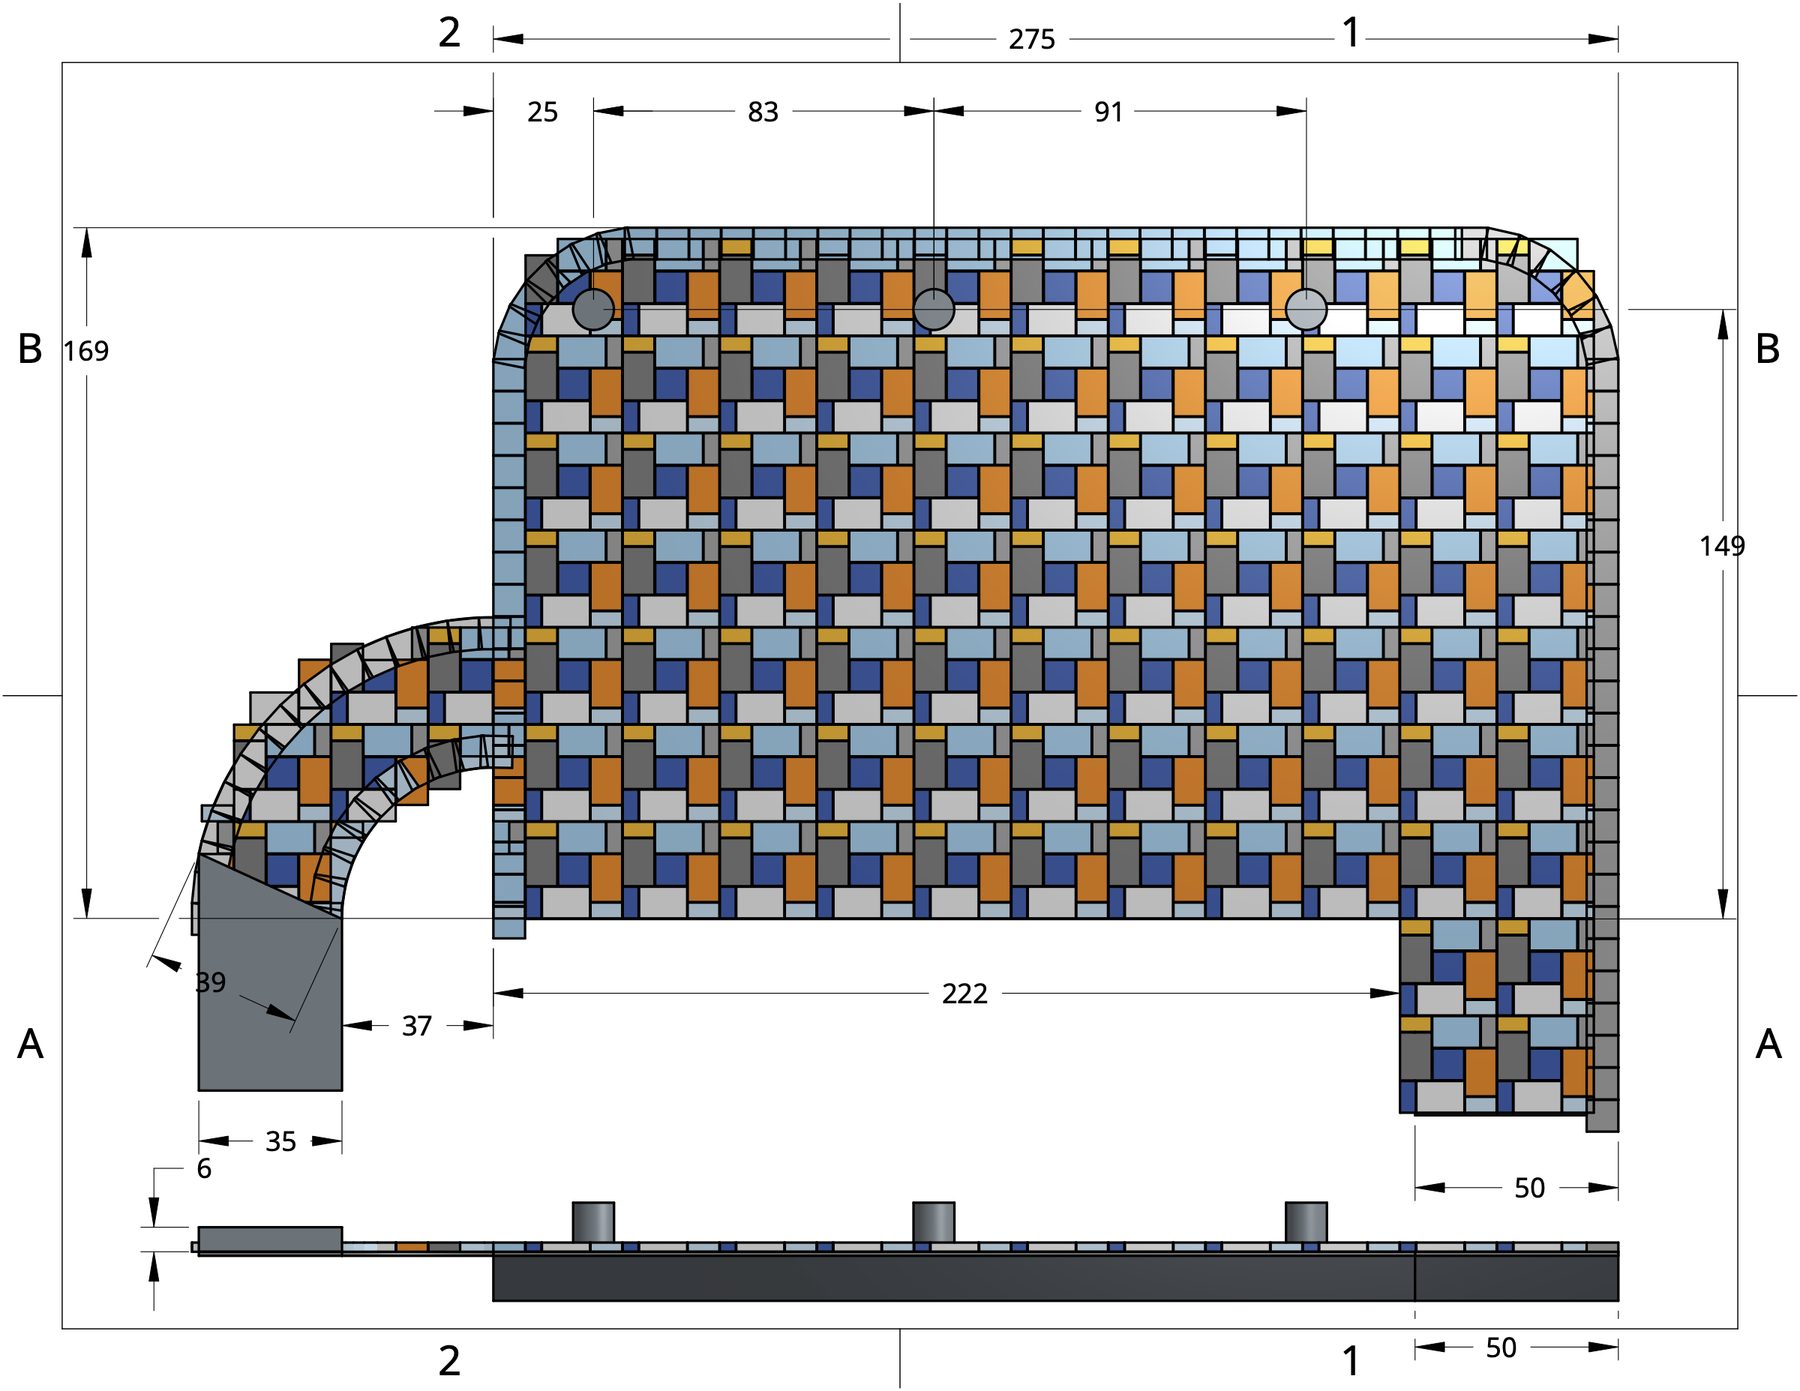
Dimensioned plan of the full three-colour patio pattern
Jun 29 · Drawing

Dimensioned plan

The full pattern in three colours, dimensioned for layout on site.
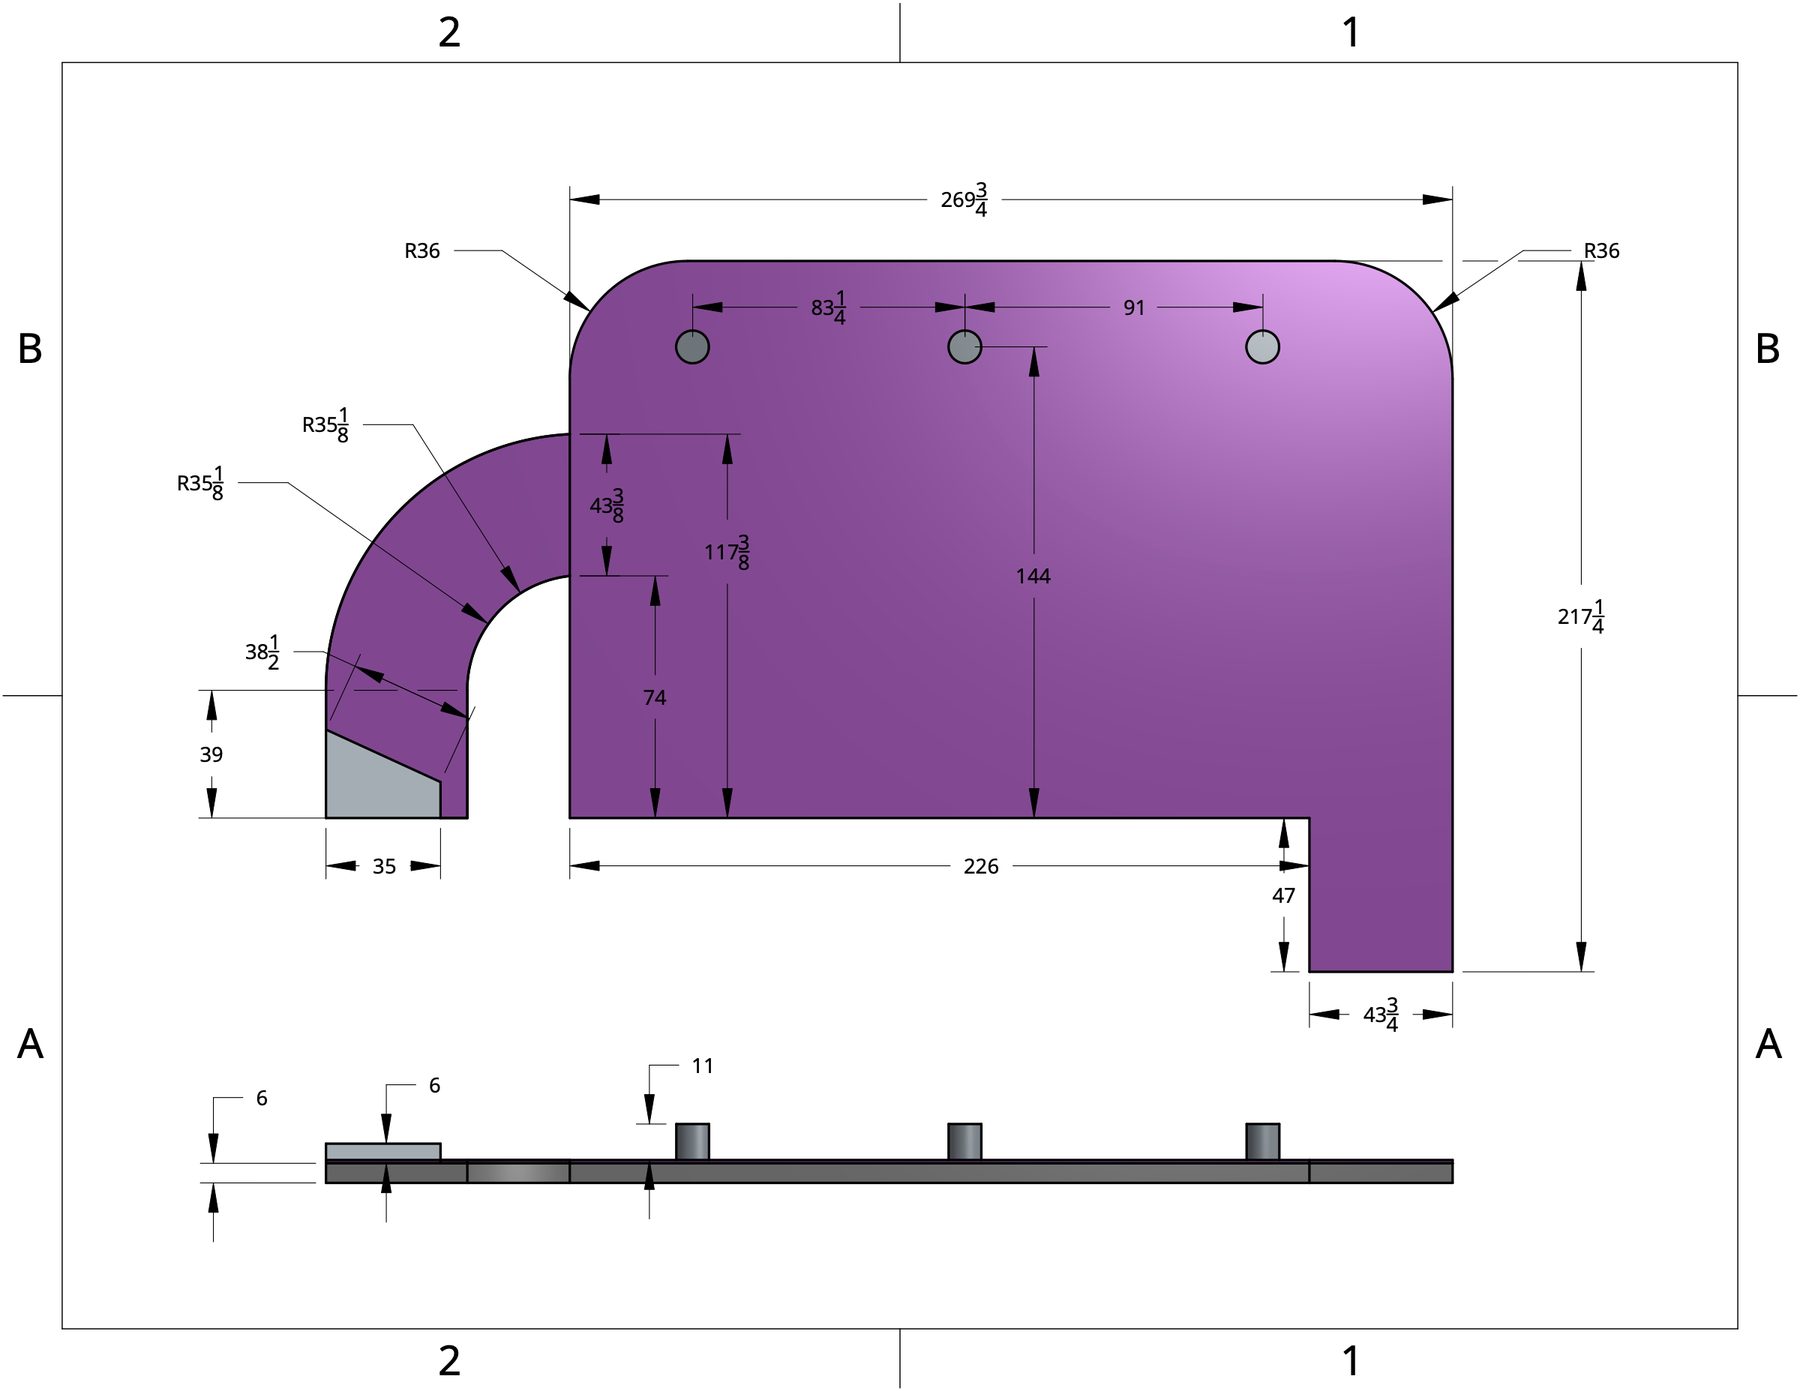
Dimensioned plan of the excavation and gravel base
Jul 7 · Base

Base plan

The dig and gravel base outlined and dimensioned off the deck posts.
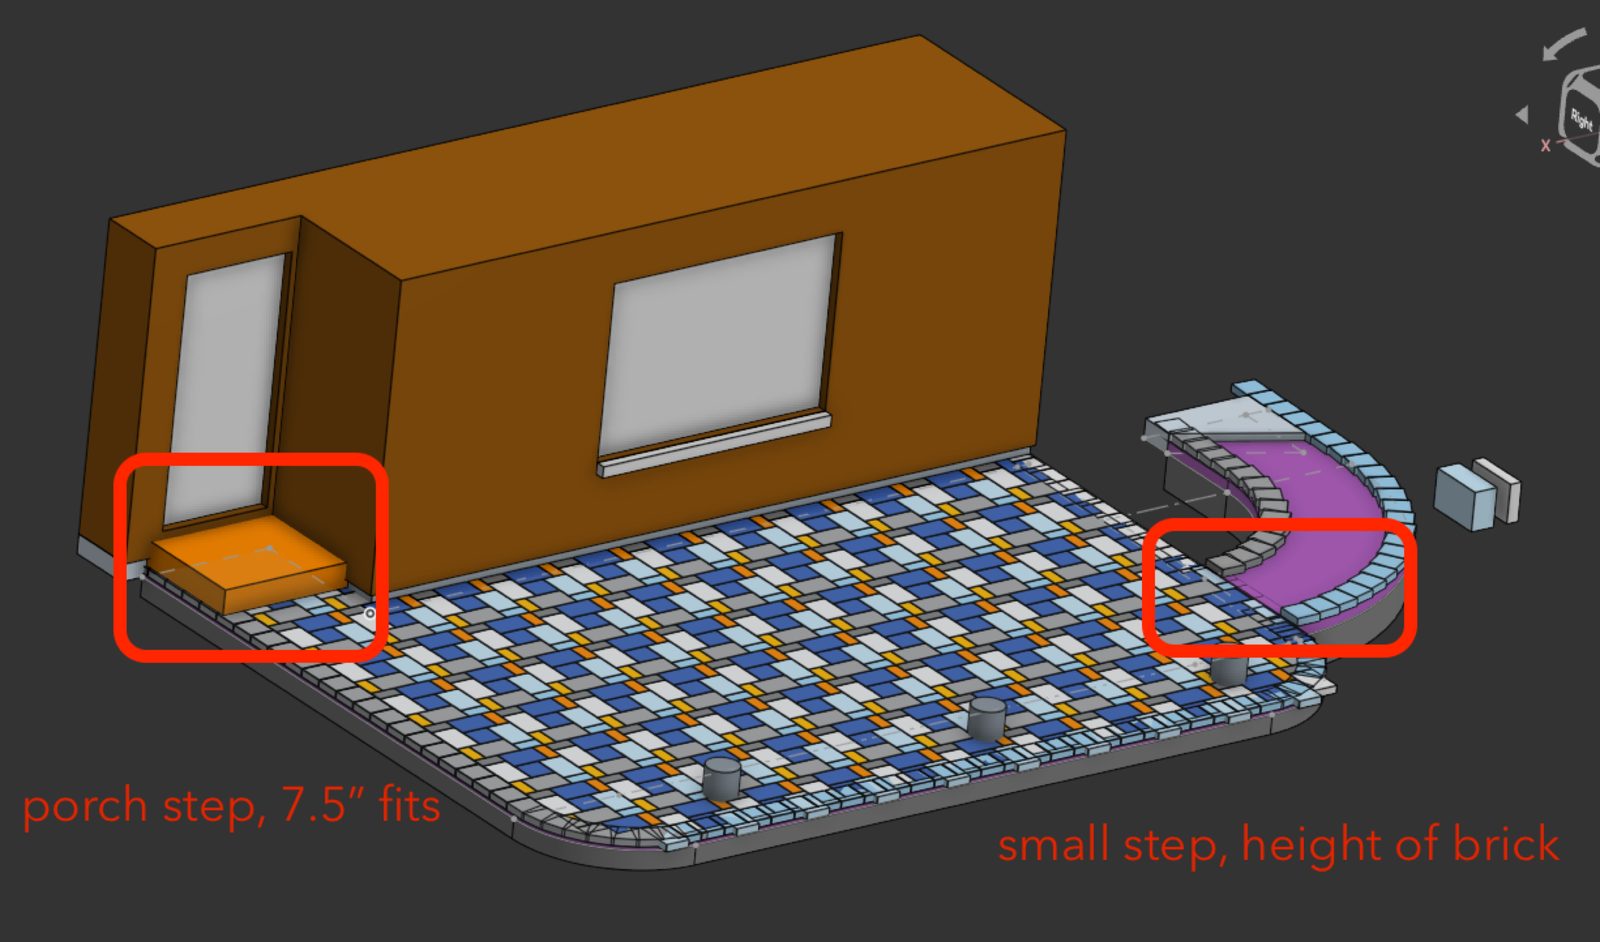
Render with the porch step and small step highlighted
Jul 22 · Steps

Checking the steps

A 7.5" porch step and a small step the height of one brick — both checked in the model.
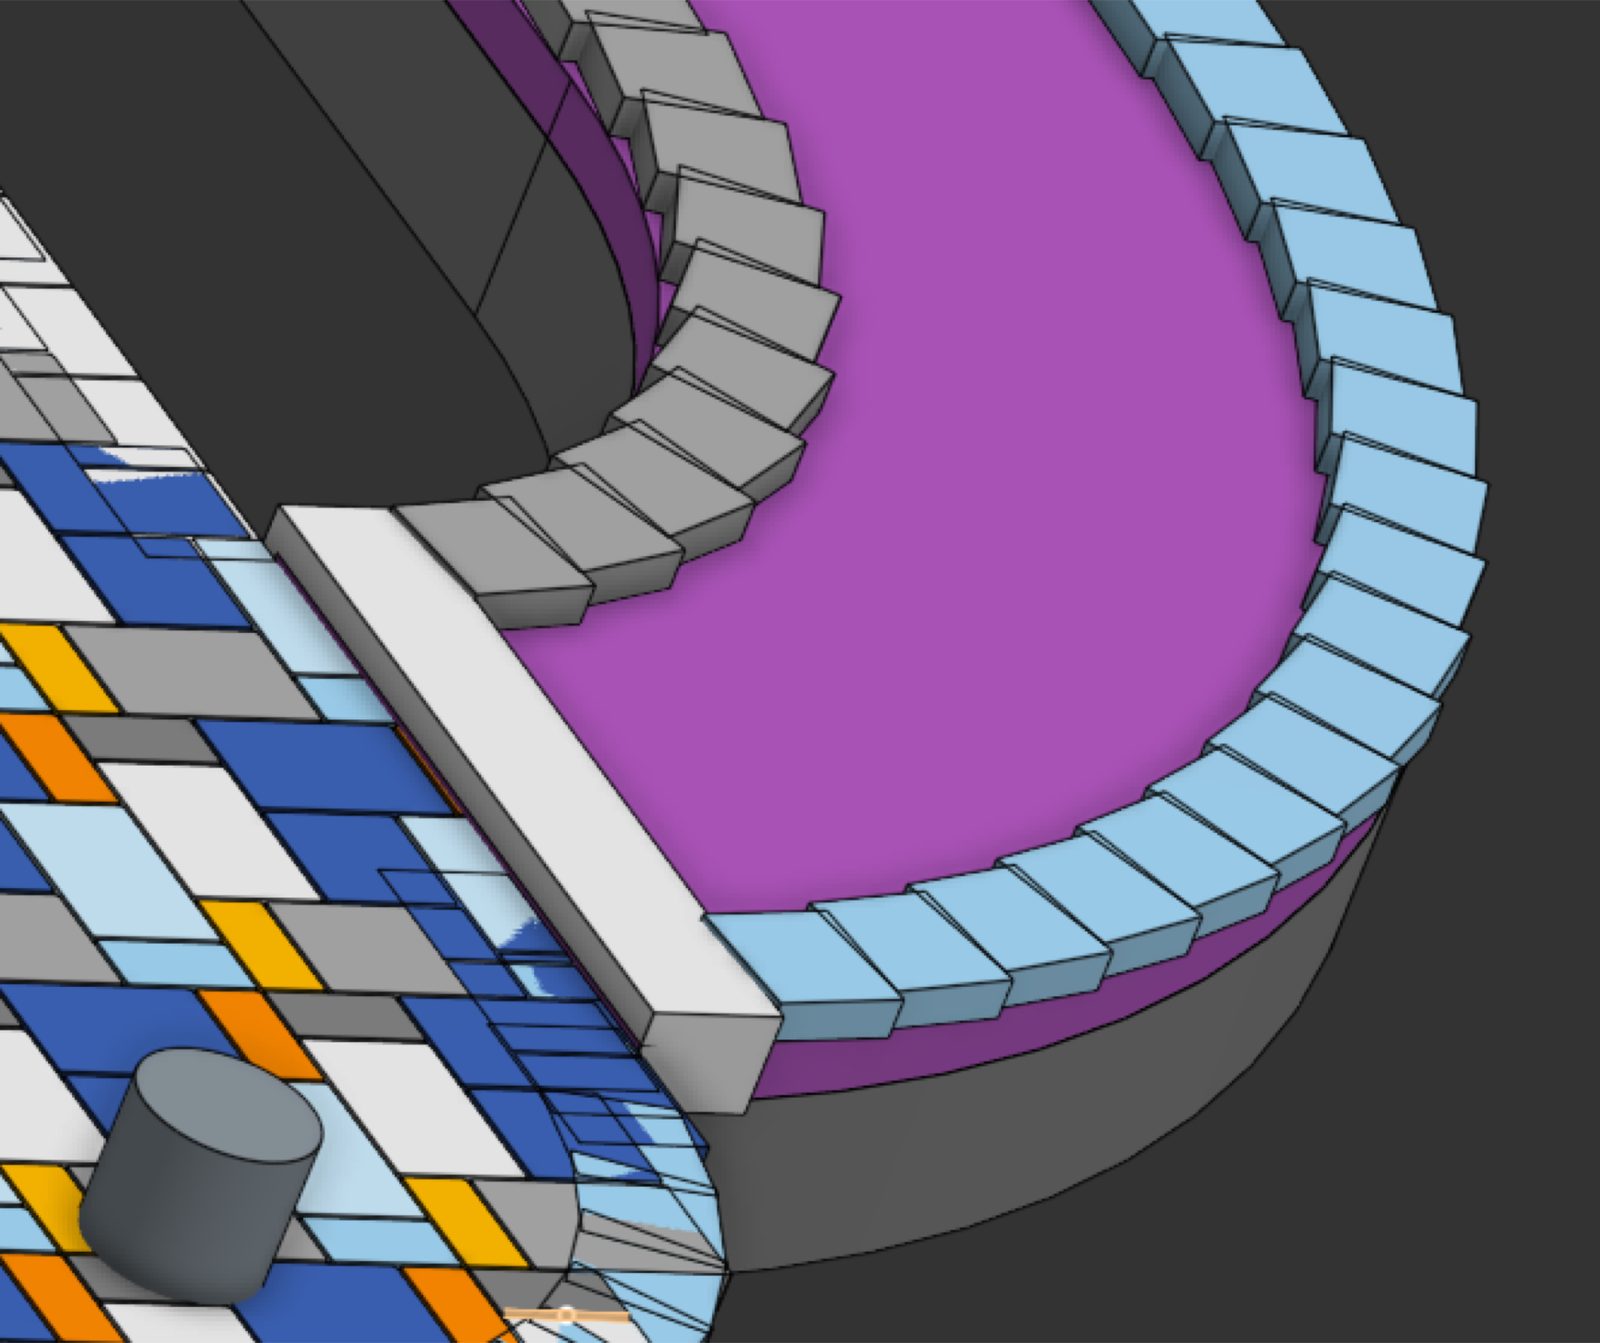
Close-up render of edge bricks fanned around the curved walkway
Jul 24 · Detail

Curved walkway

Edge bricks fanned around the curve, sitting on the base below.
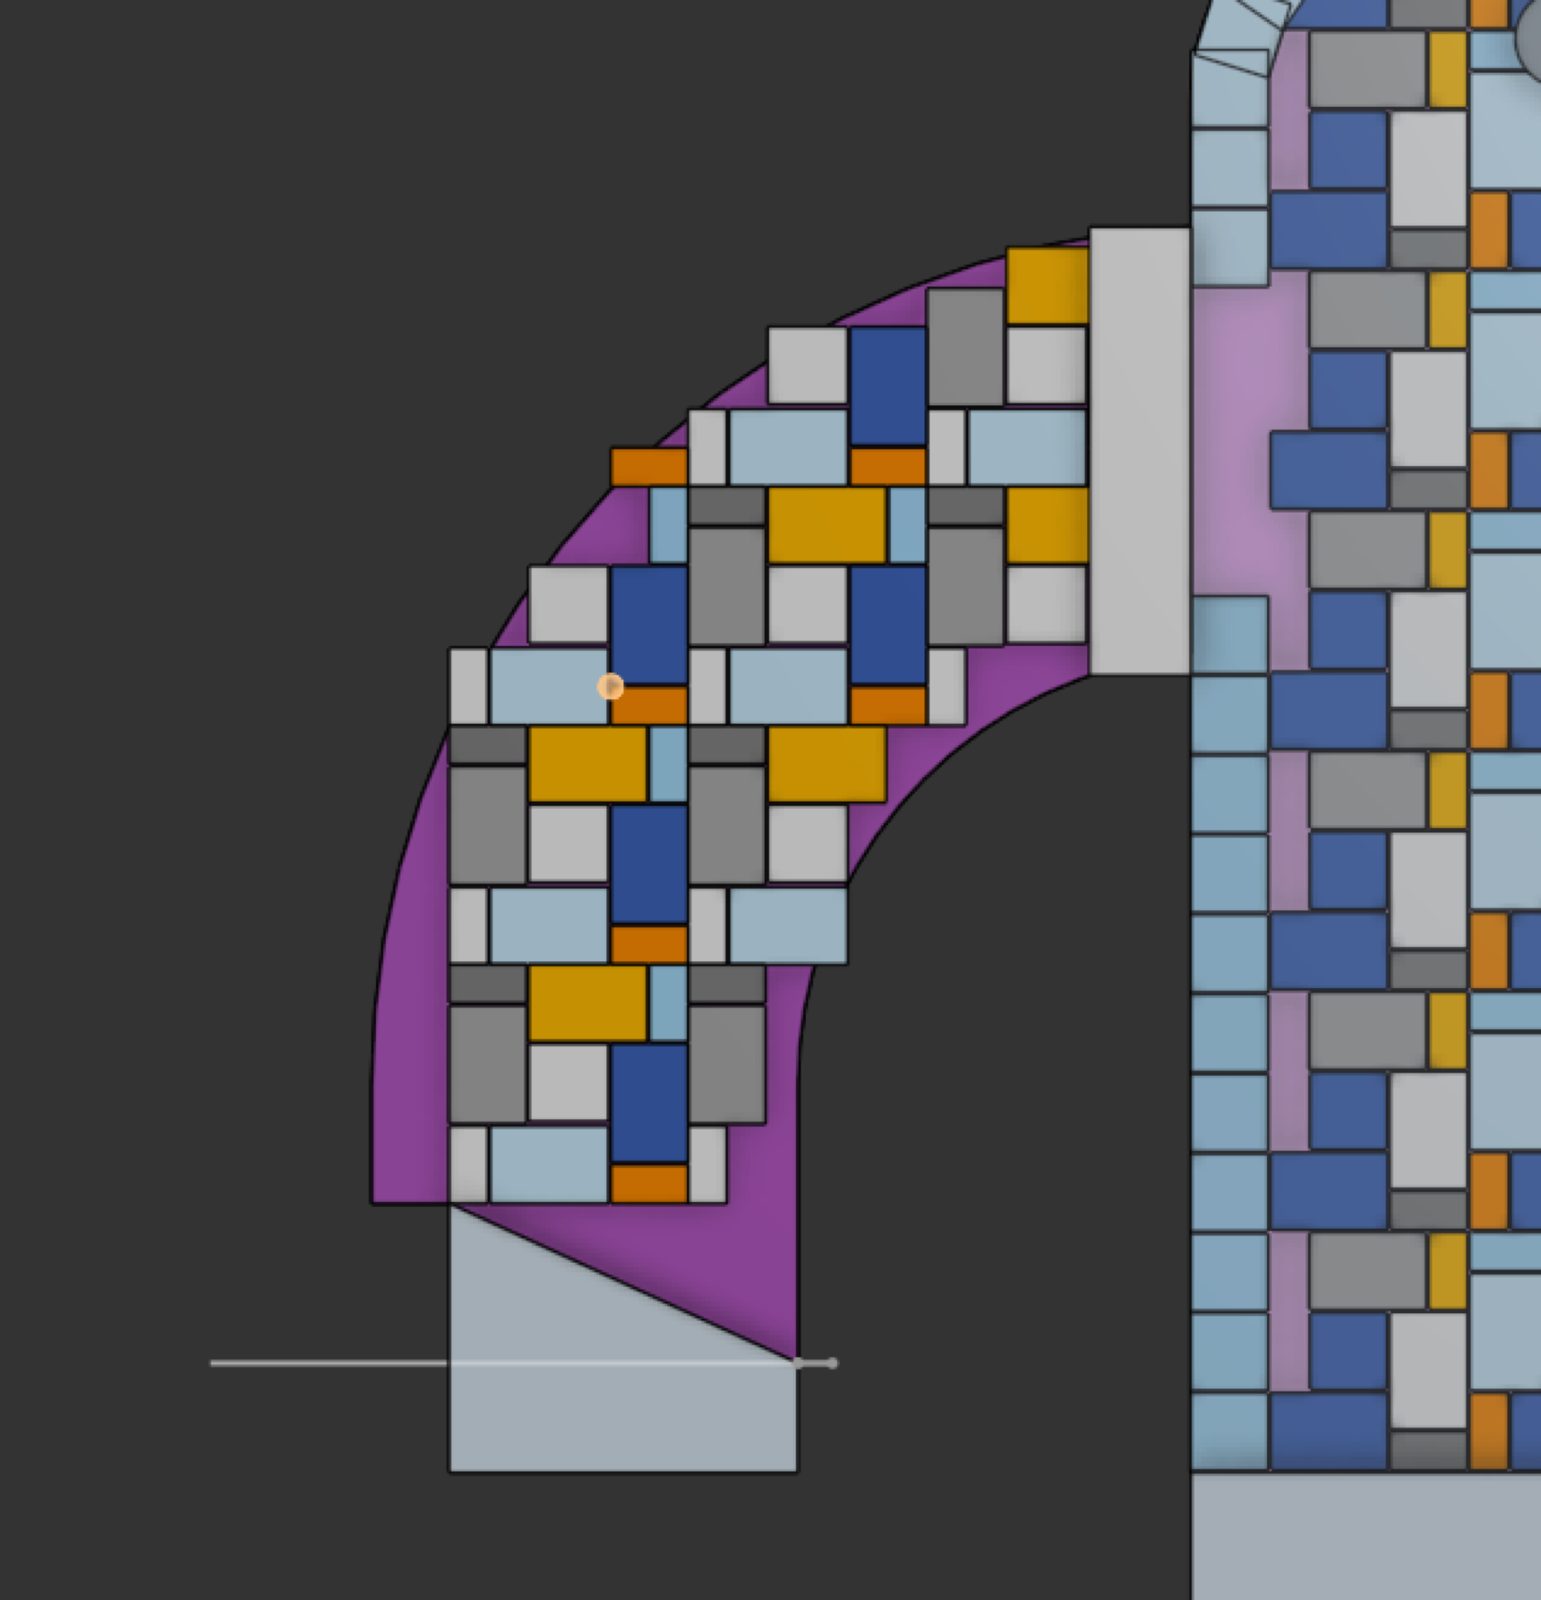
Plan of every cut brick on the curved walkway
Aug 25 · Cuts

Cutting the path

Every cut brick on the walkway drawn before the saw came out.
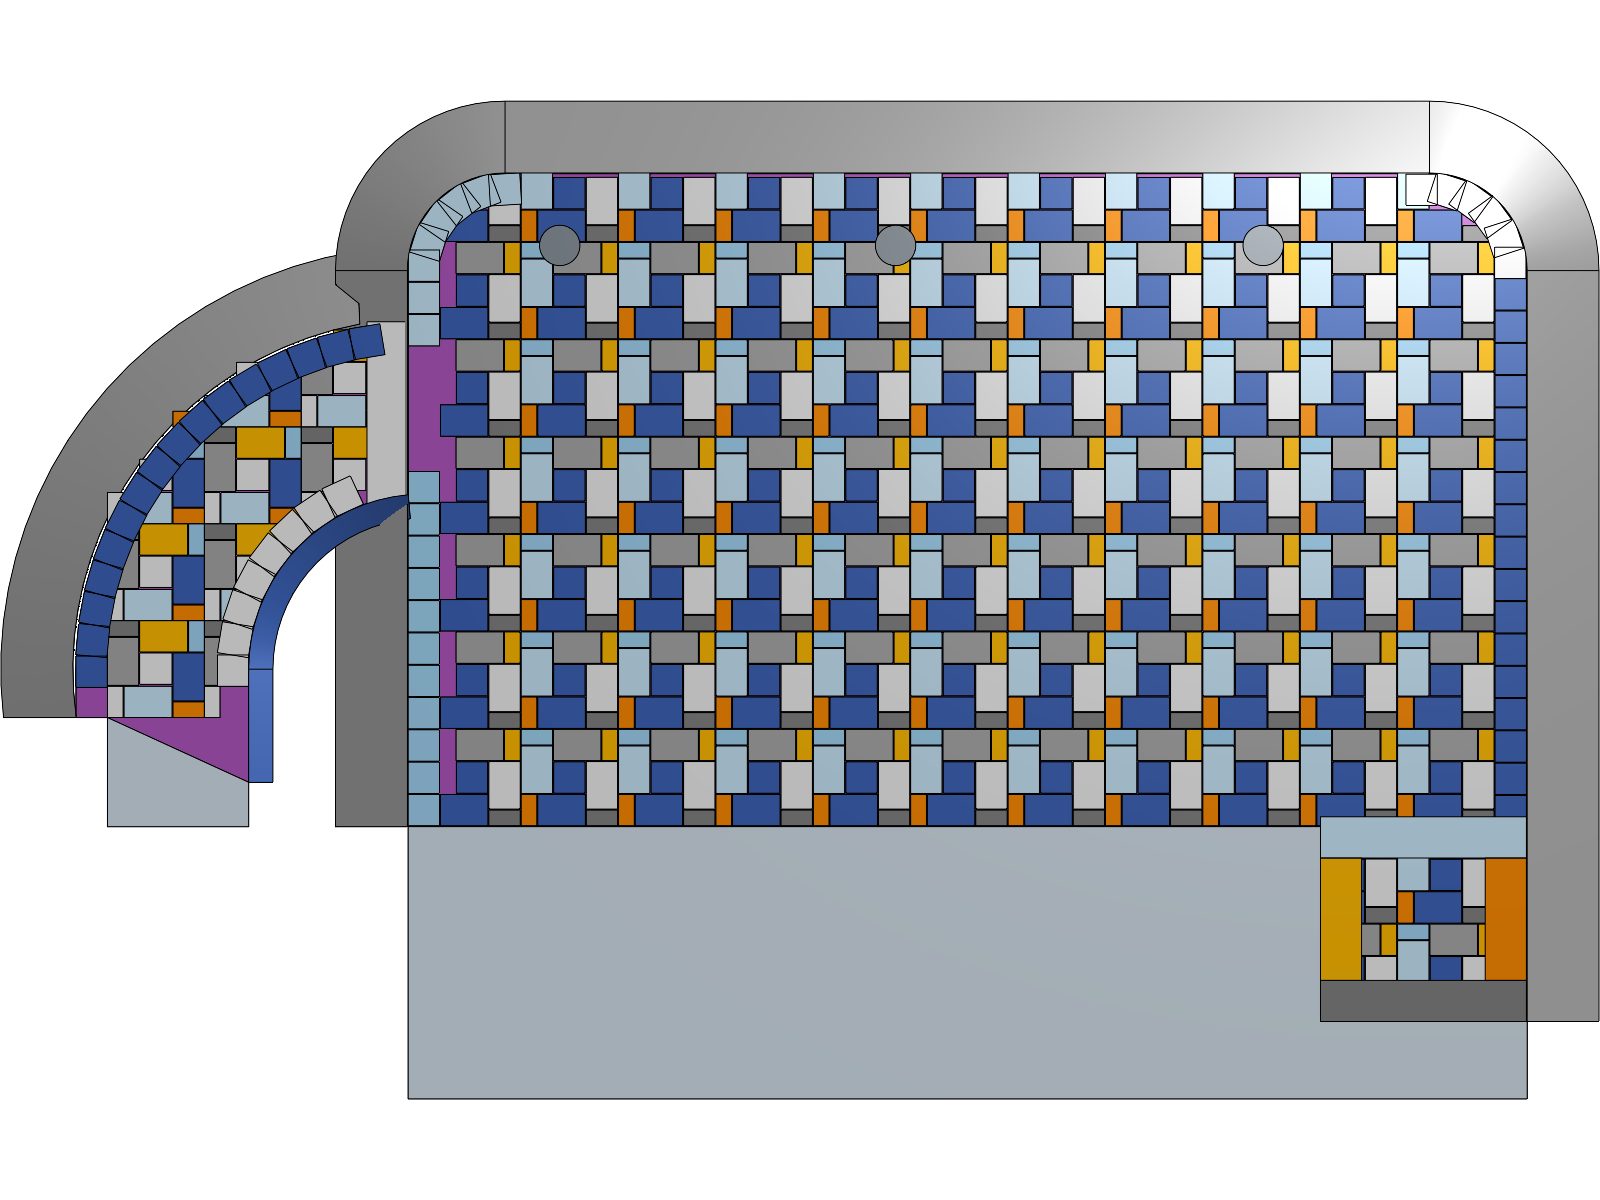
Top view of the final patio model
Final

Final plan

Main patio, border, curved walkway, and porch step — the model the build followed.


On site

Laser, string lines, and the drawing on a clipboard — the model, carried onto the gravel.
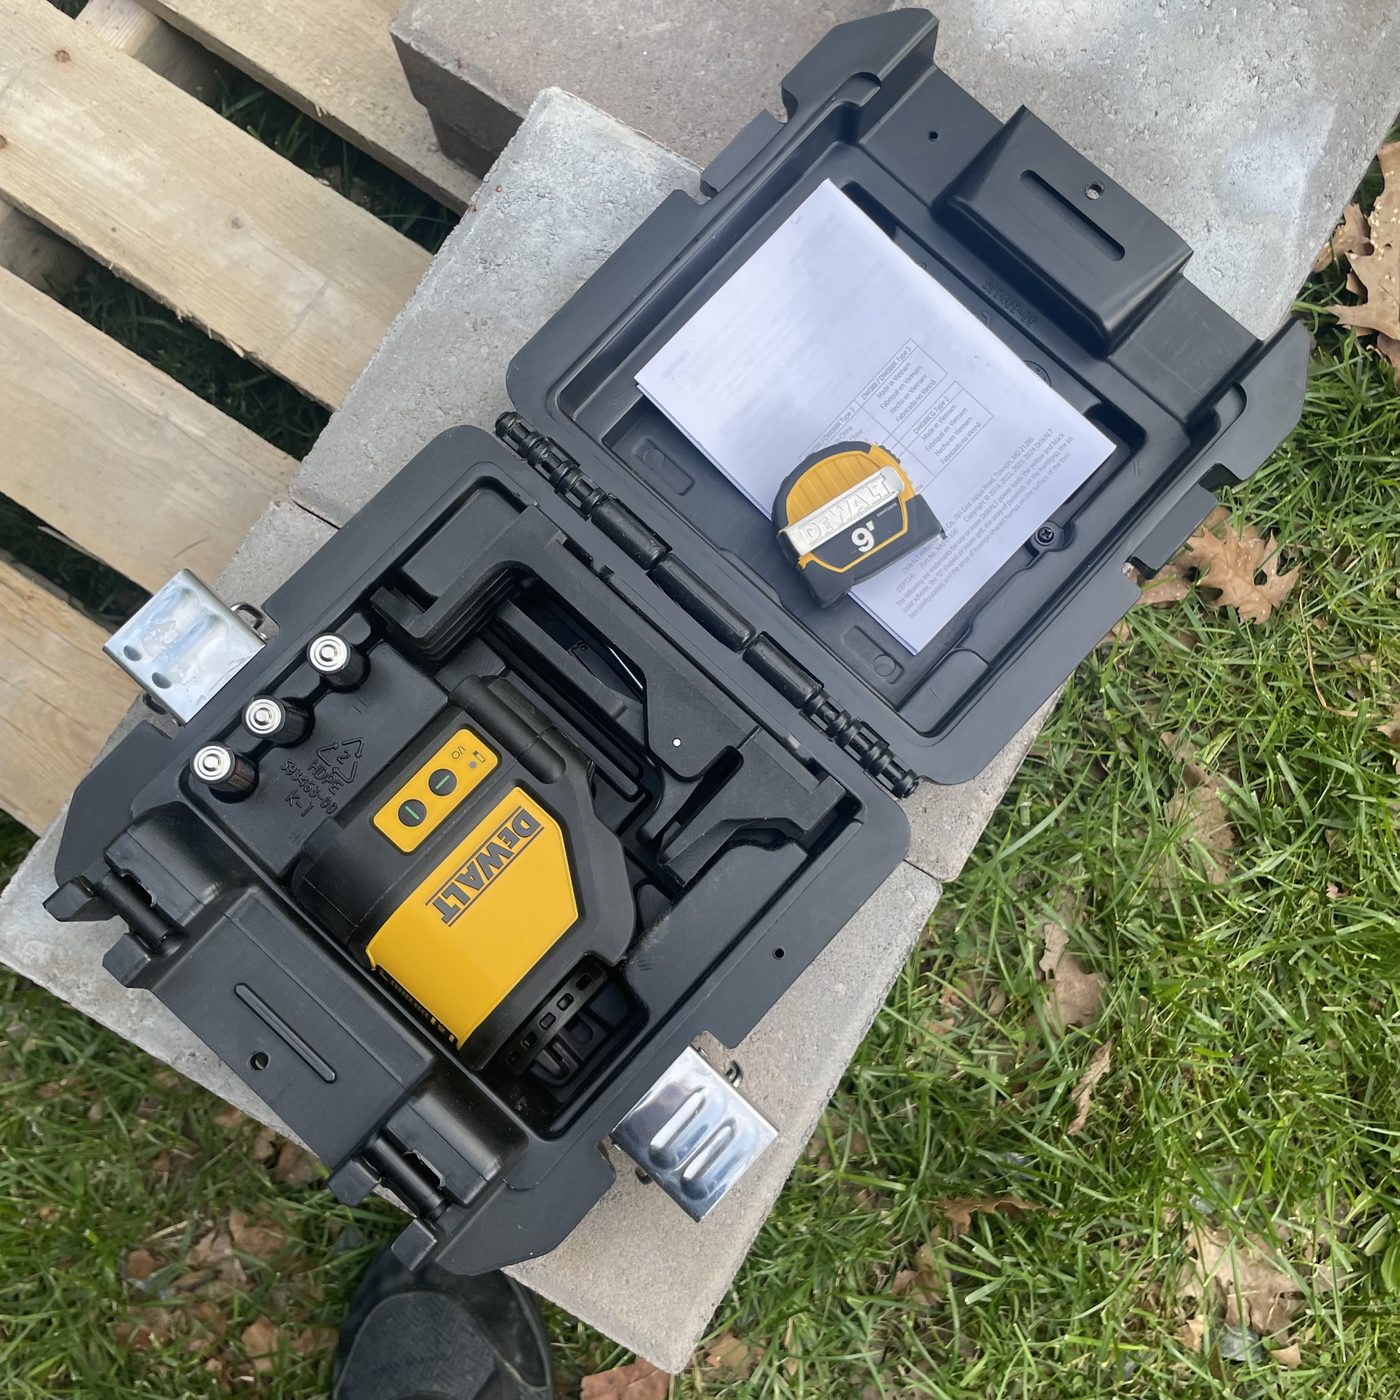
Cross-line laser level in its case on a paver
Setup

Laser level

A self-levelling line laser sets grade across the whole site.
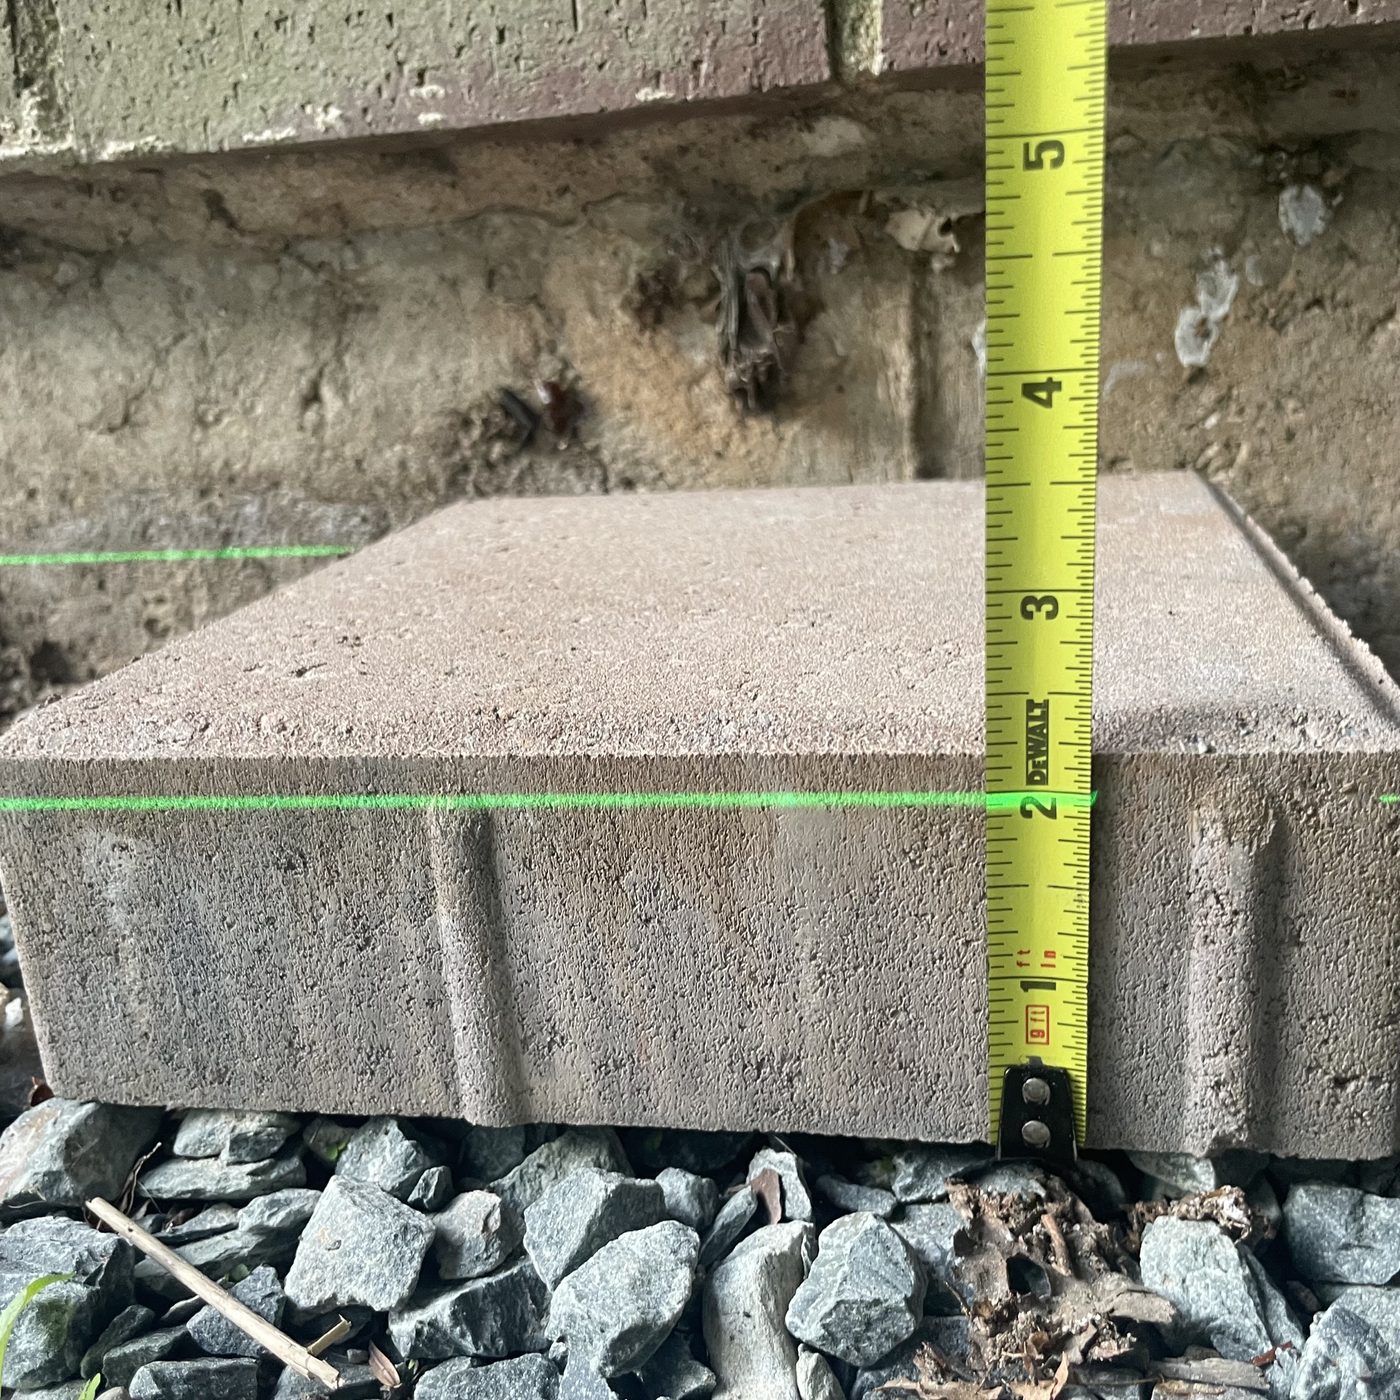
Tape measure against a paver with a green laser line across it
Grade

Setting the height

Laser line on a test paver to set the finished height along the house.
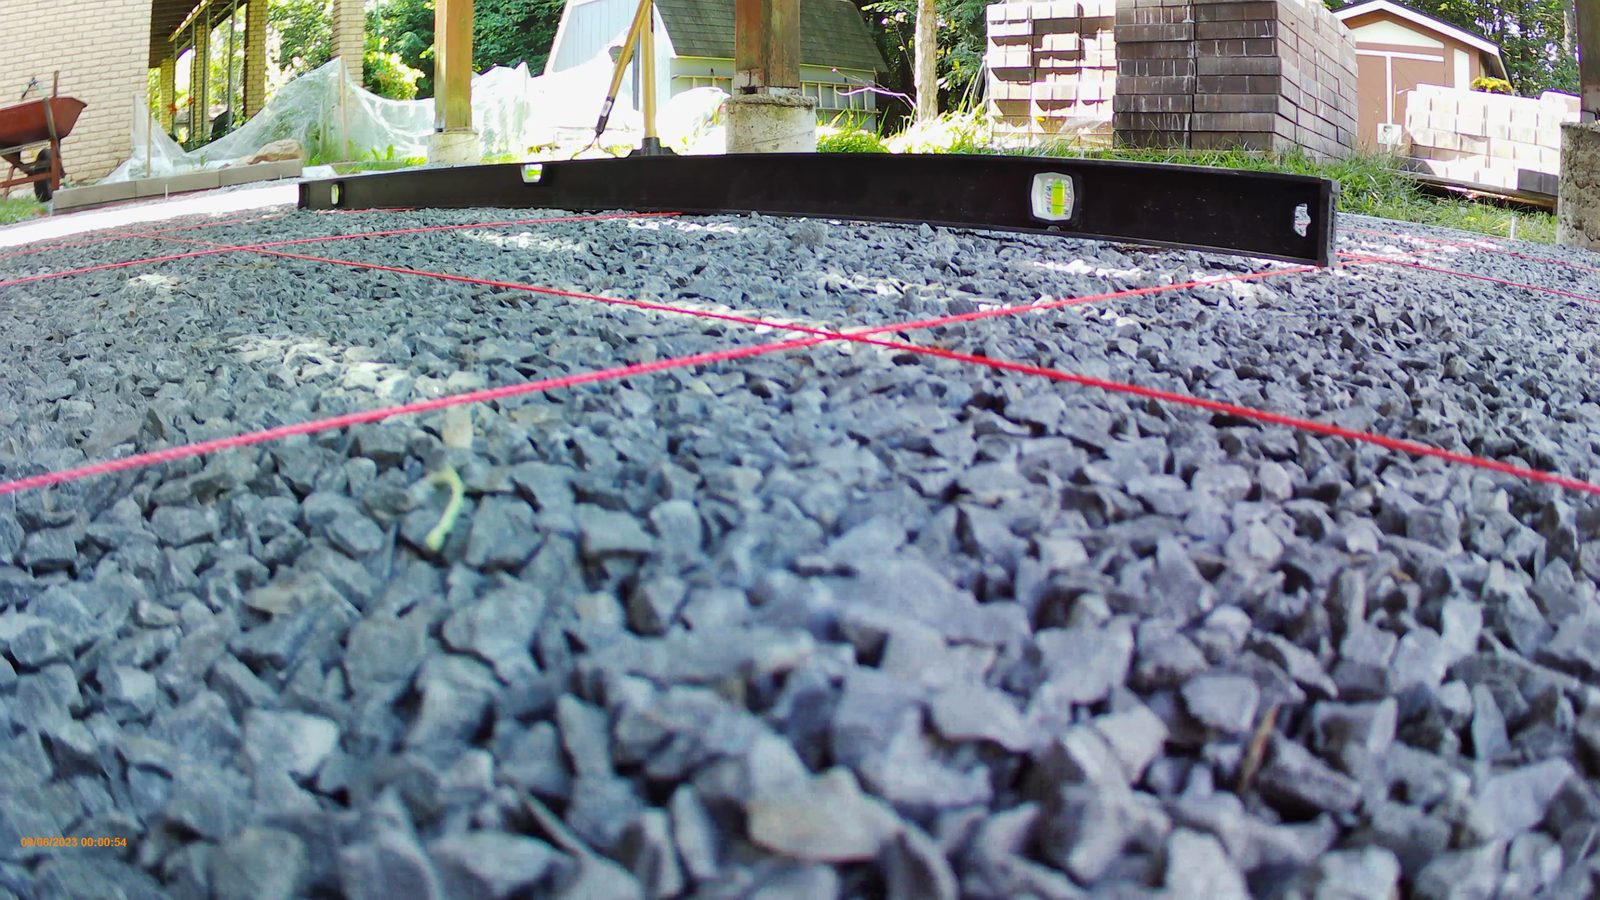
Compacted gravel base with string lines and a level
Base

String matrix

Compacted base with a grid of string lines and a straightedge.
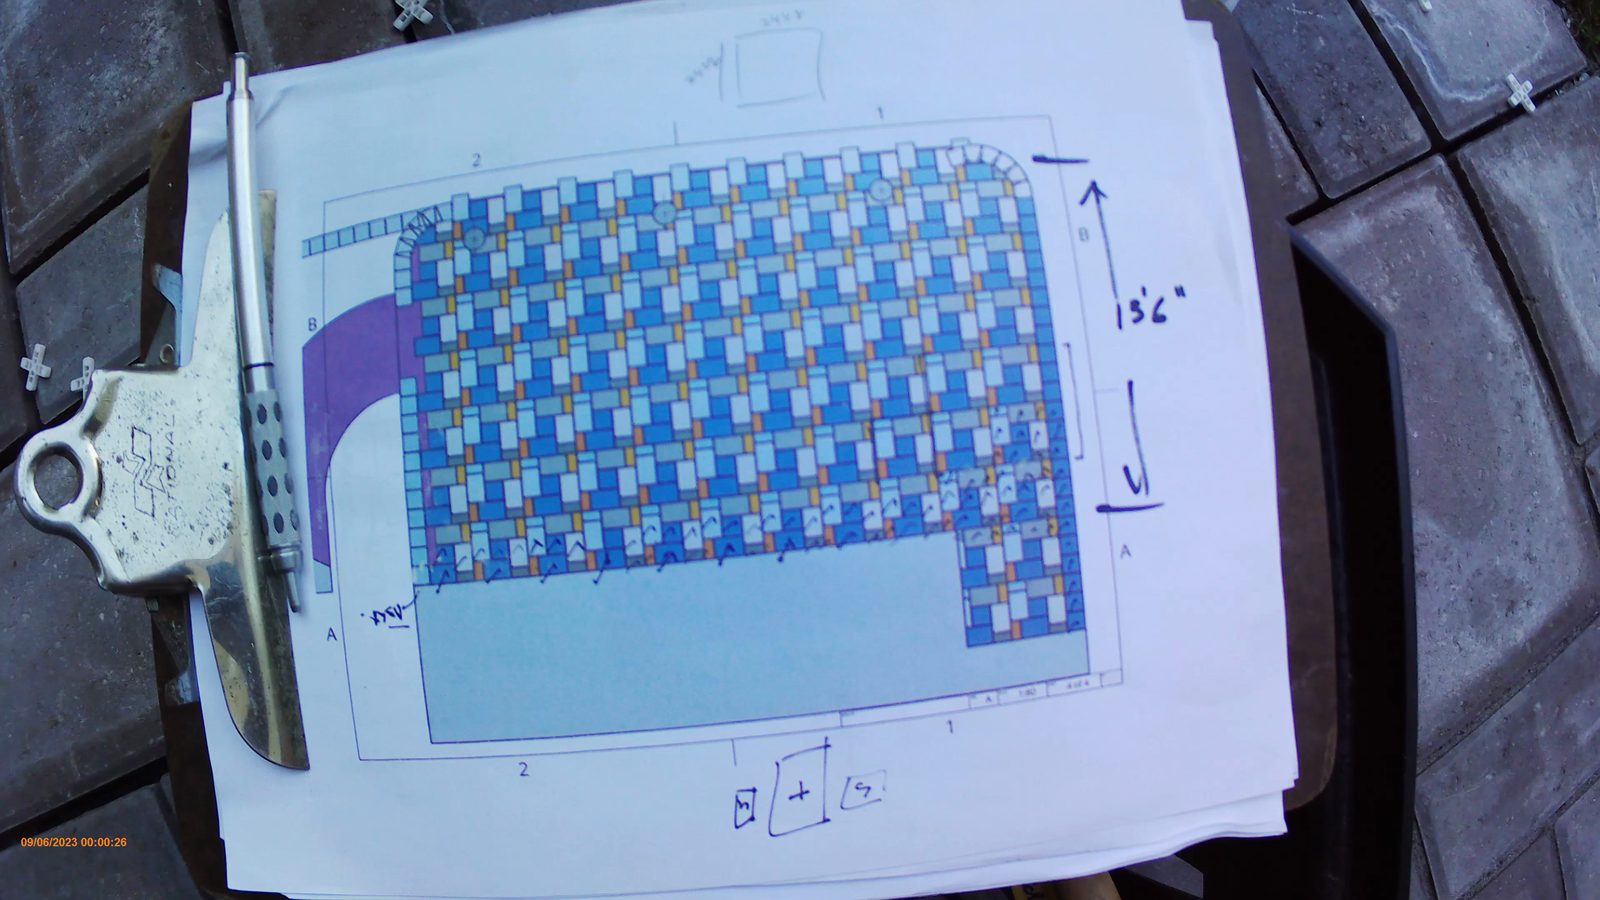
Printed patio pattern drawing clipped to a board on the job
Layout

Drawing on the job

The printed pattern beside the work, checked row by row.
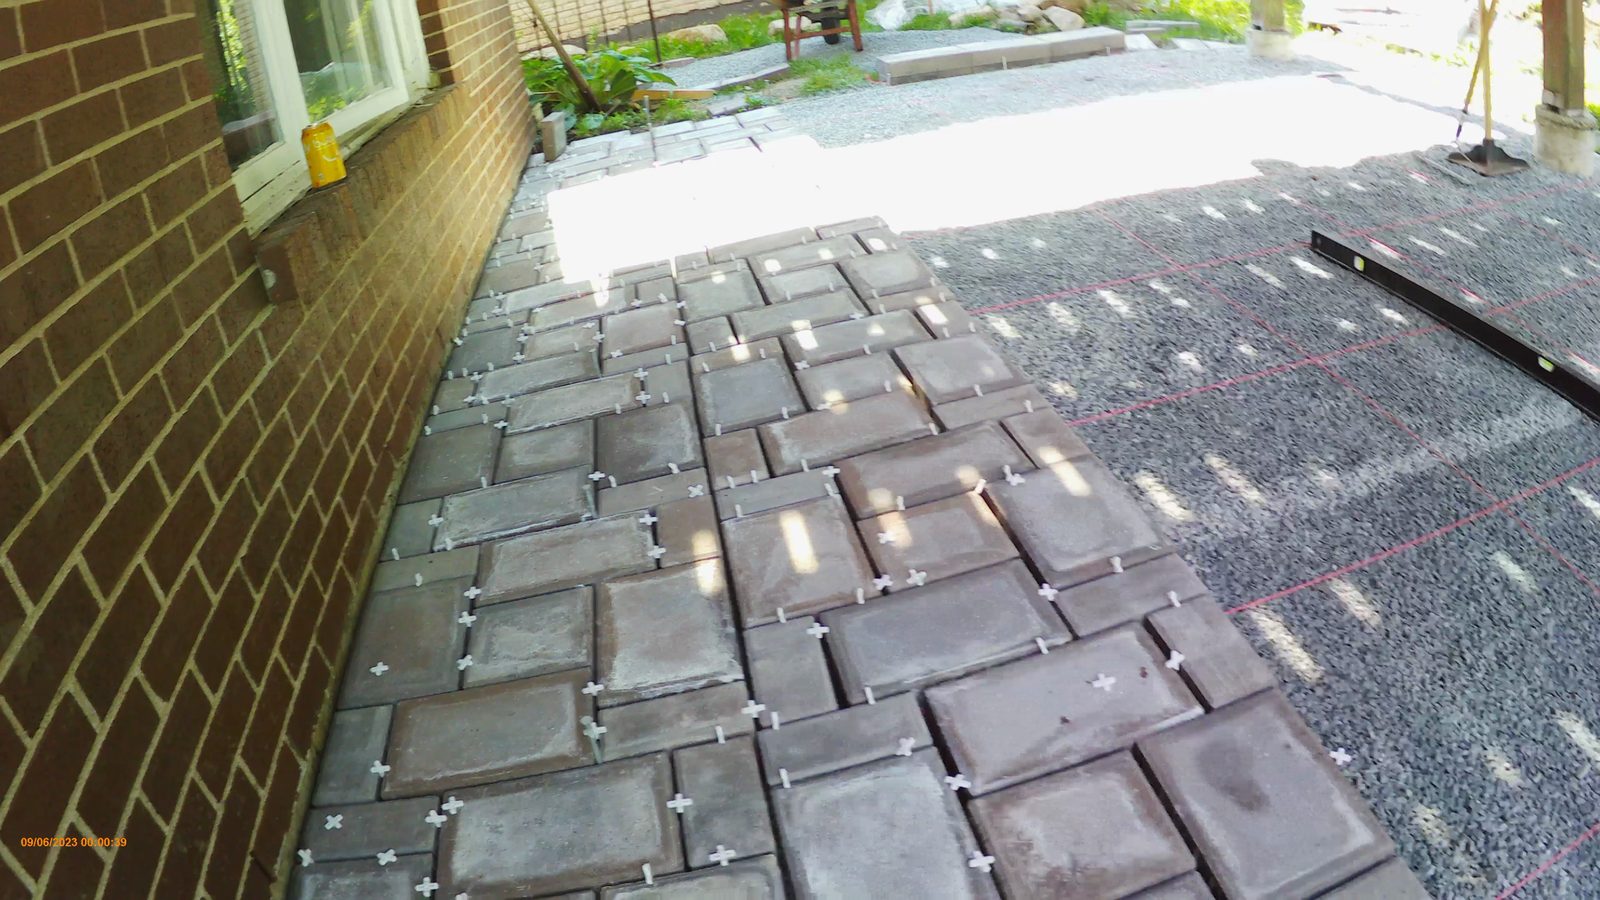
First rows of pavers laid along the house wall
Laying

First rows

Pavers laid along the house, each row landing on its string line.
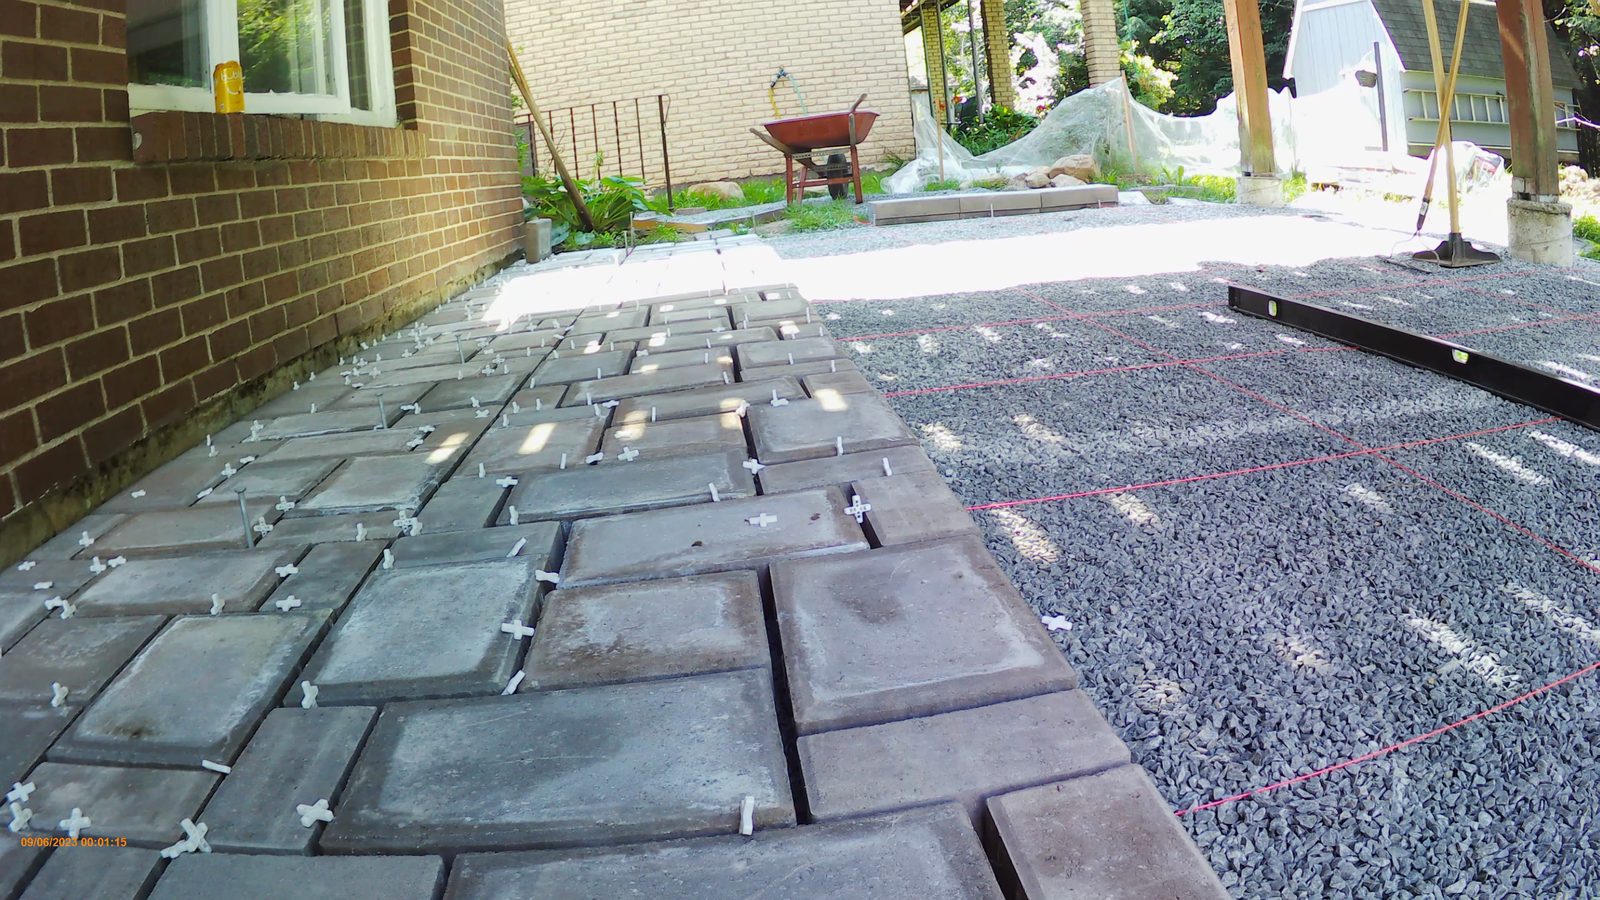
Pavers spreading across the base under the string grid
Laying

Working outward

The pattern working out from the house across the grid.
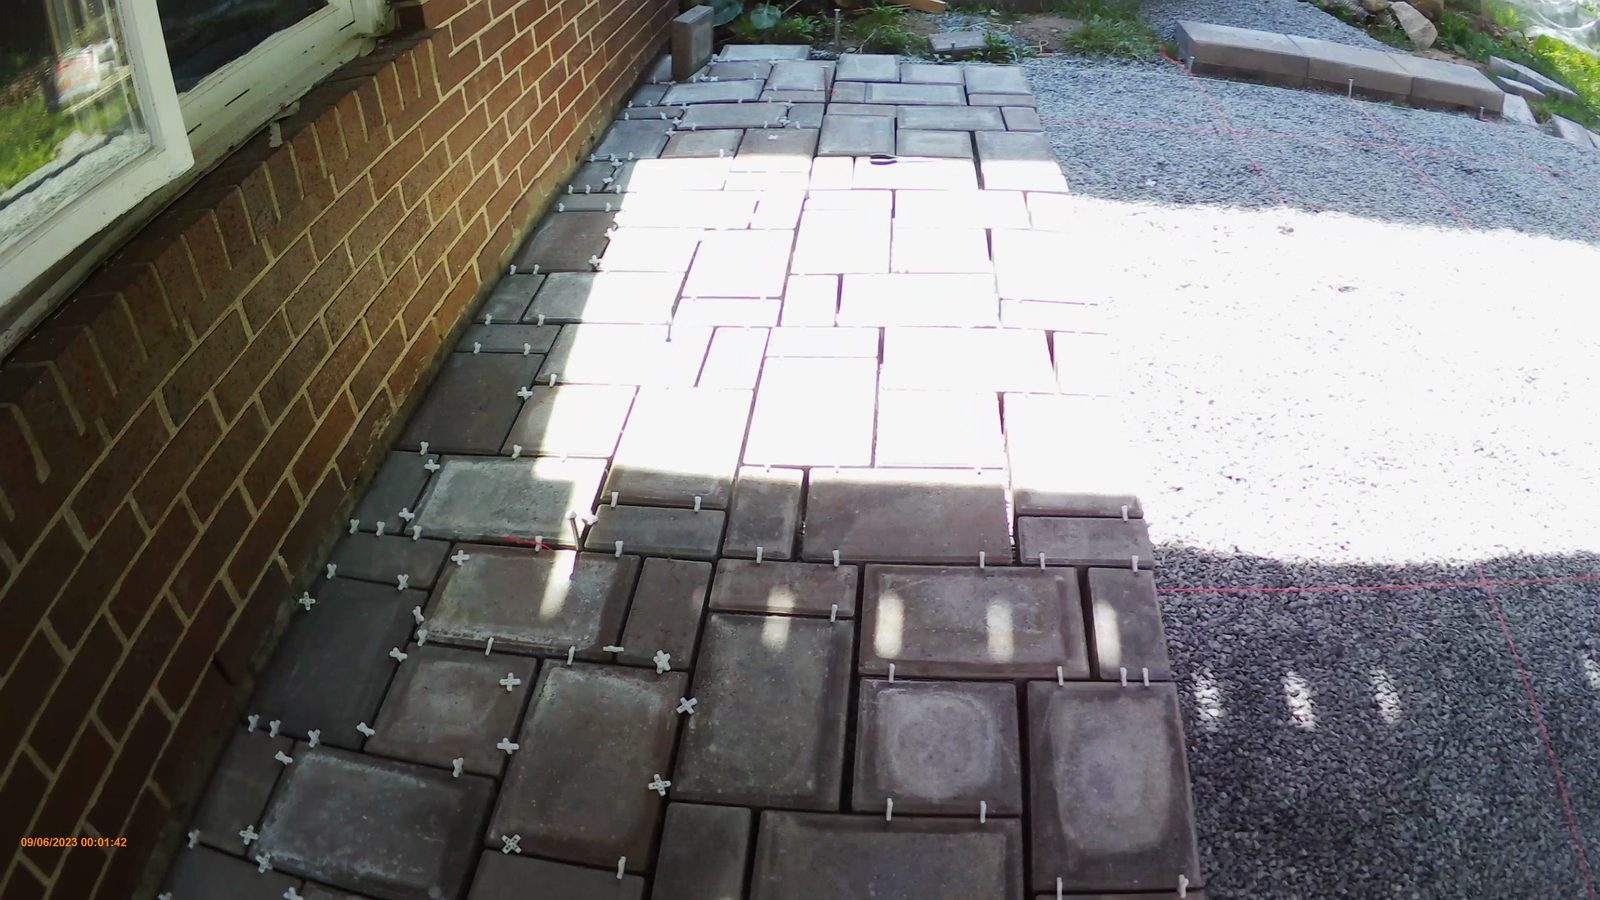
Large area of pavers laid under the deck
Laying

Filling in

The main field filling in, row by row.


The process

Start to finish

  1. Design with the client — Model the patio in CAD and work through the pattern together.
  2. Order materials — Pavers, base, and sand, with quantities from the model.
  3. Prep the site — Clear and dig out the area.
  4. Compact and level — Run the compactor and level the base.
  5. Brick matrix — String a grid of lines and lay the bricks to it.
  6. Cut the walkway — Saw-cut the pavers to shape the walkway.
  7. Sand the bricks — Sweep sand into the joints.
  8. Topsoil and seed — Fill in around the edges and seed.

Lessons learned

01

A concrete saw is necessary

You can't cut pavers cleanly without one.

02

CAD is critical

The pattern, the cuts, and the material counts all come out of the model.

03

Set up a matrix of lines

A grid of string lines gets every stone roughly in the right place, so small errors don't compound across the patio.

04

Bricks are heavy

Plan how you'll move them before they arrive.

05

Rent a front end loader

Landscaping is much easier with one.